
Transaction Types Edit View
In QuickEasy BOS, recordkeeping is done using Transaction Types. Before transactions can be captured, these steps must be completed:
- Create a Transaction Type for every transaction needed (e.g. Customer Invoices, Credit Notes, General Journal, Bank Payments) and complete the additional tabs:
- Choose the Settings.
- Create Statuses.
- Create Categories (optional).
- Create rules for copying the transactions and set user access for those rules (referred to as Copy Rules).
- Create or import forms (e.g. Invoices) that apply to the transactions (known as Output Templates).
- Set the User Access for the Transaction Type.
- Add the Transaction Type to the Menu. This step is optional for Transaction Types that post to the ledger (accounting is enabled), because they can be accessed and created from the ledger interface.
Organisations can create as many Transaction Types as they need (e.g. Invoices, Cashbooks, Journals).
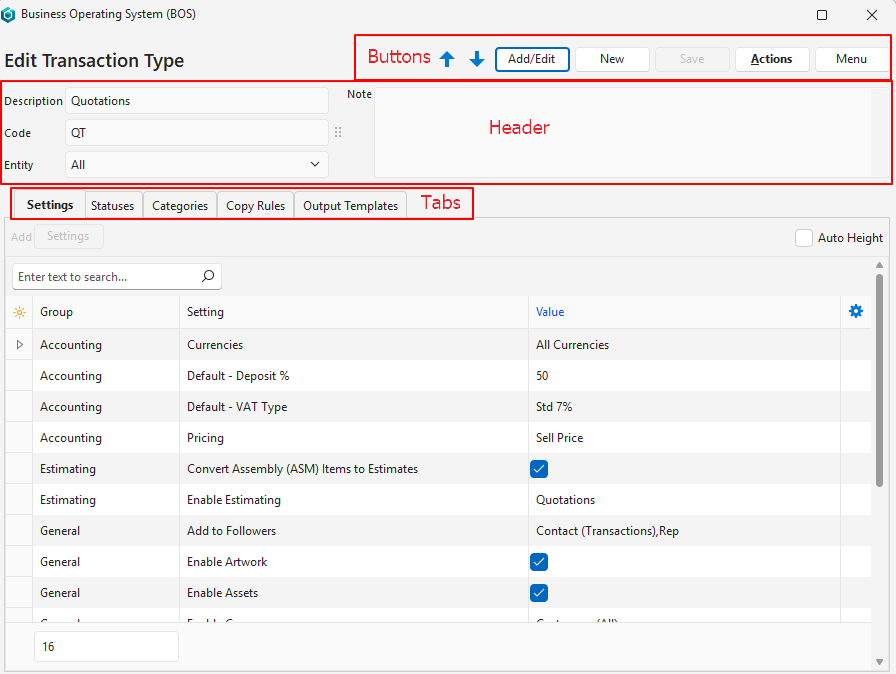
Buttons Explained
| Button | Description |
|---|---|
| Arrows | Navigates between Transaction Types. |
| Add/Edit | Adds data or edits the fields. |
| New | Creates a Transaction Type. |
| Save | Saves any changes. |
| Actions |
|
| Menu | Settings
|
Fields Explained: Header
| Field | Description |
|---|---|
| Description | Enter a description. |
| Code | Enter an abbreviation of the description. Many reports show only the code and transaction number (e.g. CI 5). If the Code is also used by other Transaction Types, the warning bar shows “Transaction Code is used on other Transaction Types” and lists them. The comparison ignores upper and lower case and leading and trailing spaces. Transaction Types without a code are not checked. The warning is refreshed when you save the Transaction Type. See Incorrect Mix of Settings Warnings. |
| Entity | Select All or a specific entity from the dropdown list. |
| Note | Enter a note. |
Tabs Explained
Each tab is explained in detail on its own page.
| Tab | Description |
|---|---|
| Settings | Create or edit settings for the Transaction Type. Settings (button) next to Add: Opens a list of all the available settings that are not yet added. To show all the settings, check the Show All box. Auto Height checkbox: Adjusts the height of the rows to fit the view (applicable if lookup lists are created). Settings determine the transaction’s features. |
| Statuses | Create or edit statuses for the Transaction Type. Statuses manage transactions (e.g. whether the transaction can be edited or is posted to the ledger). |
| Categories | Create or edit categories for the Transaction Type. Categories are optional and used to sort and filter transactions. |
| Copy Rules | Set the rules and conditions for copying transactions. User Access must be set for each Copy Rule. |
| Output Templates | Create or edit Output Templates for the Transaction Type. Output Templates are the forms or reports generated from transactions (e.g. quotations, invoices). |