
Calendar Types Settings
Overview
You can create multiple calendars and customise the settings for each calendar by creating a Calendar Type. This page explains the settings that can be added to a Calendar Type. For what calendars can do, see Calendars Interface.
- Once created, a Calendar Type must be added to a Menu Group (any menu) before it can be used.
- User access is set for each Calendar Type separately.
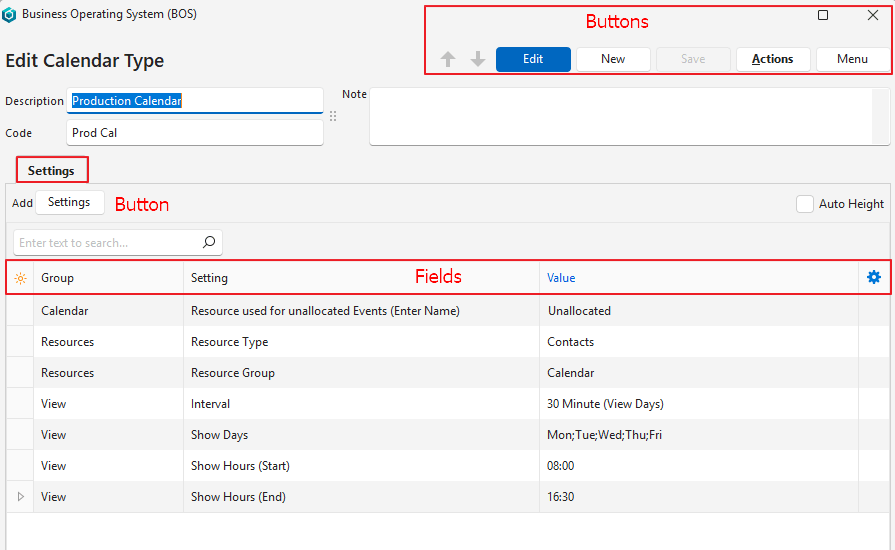
Settings Explained
| Setting | Description |
|---|---|
| Calendar > Resource used for unallocated Events (Enter Name) | Enter a name for unallocated calendar entries (e.g. Unallocated). Used when the next available resource should perform a task. These entries can be dragged and dropped onto resources. |
| Resources > Resource Type | Select:
This selection affects which groups are available under Resource Group. |
| Resources > Resource Group | Select which group the calendar belongs to from the dropdown list. The groups are those created for the Resource Type (e.g. Assets or Contacts). The list changes if the Resource Type is changed. The group identifies the resources to show on the calendar (e.g. which staff members or assets). |
| View > Interval | Select the calendar interval from the dropdown list. Events are rounded to the nearest interval. The options are:
|
| View > Show Days | Check the boxes next to the days of the week that should appear on the calendar. |
| View > Show Hours (Start) | Select a start time for the minute steps selected under View > Interval. The start time should be when the day or shift starts (e.g. 08:00). |
| View > Show Hours (End) | Select an end time for the minute steps selected under View > Interval. The end time should be when the day or shift ends (e.g. 16:30). |