
Notes and Attachments Panel
- Notes and attachments can be linked to all the core modules, such as Contacts, Entities, Items and Transactions.
- When opened from a linked document, the interface appears only on the right.
- Attachments can also be viewed and managed from the Attachments Module.
- A note or attachment added to a transaction or a Service Manager job that is linked to an asset is linked to that asset too, so it also appears on the asset’s Notes & Attachments tab.
- Only the notes and attachments added while the transaction or job is linked to the asset are linked. Create an Asset also links the existing notes and attachments of the transaction and of its linked Service Manager job.
- A note or attachment added on a Service Manager job or task is linked to the job’s person when the Service Type uses Enable Company = Internal, and to the company otherwise. Notes and attachments added before Ver 2.6.0 are not changed.
- A note or attachment can be linked to several records (for example, a transaction attachment is also linked to the customer or supplier and the asset). Deleting a contact, asset, transaction, transaction item, item, Service Manager job or task, entity or timekeeping entry removes only that record’s link. The note or attachment is deleted when it has no link left.
- For example, after a transaction is deleted, its notes and attachments stay on the customer or supplier (and the asset) they are linked to. They are deleted when that contact (and asset) is deleted too.
- The transaction flow is not a link.
- Only the database rows are deleted, not the files that the attachments link to.
Notes and Attachments Panel
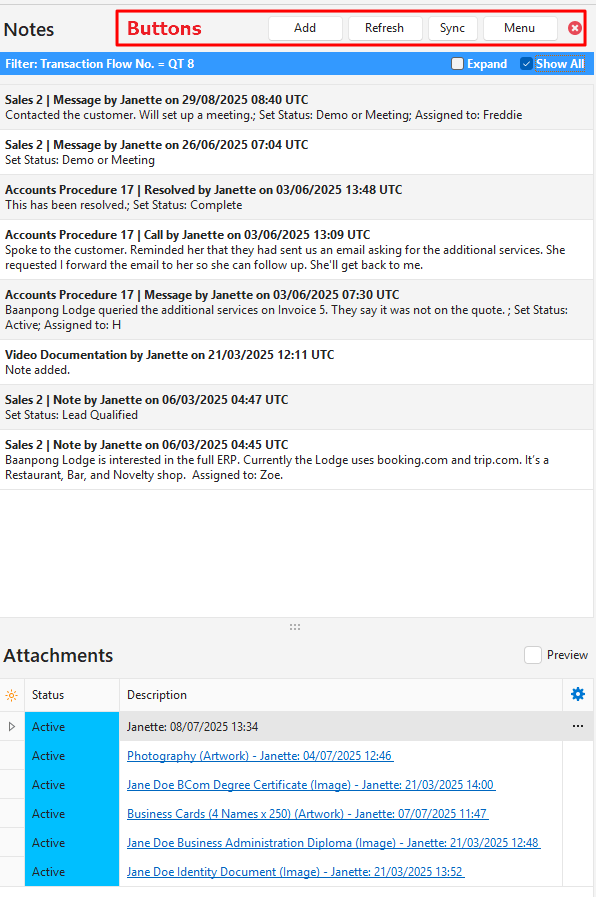
Buttons Explained
| Button | Description |
|---|---|
| Add | Adds a note or an attachment, as selected from the dropdown list. A new note opens in the Edit Note window (see Notes: Edit View). |
| Refresh | Refreshes the display to include any newly created notes or attachments. |
| Sync | Synchronises the display of notes on the right with the record opened on the left. |
| Menu | Layout |
| Close (x) | Closes the Notes and Attachments popup. |
Filters Explained
| Filter | Description |
|---|---|
| Expand (Notes) | By default, a preview of the note appears, with line breaks removed and the text truncated to 255 characters. If the General Setting General > Enable Rich-Text in Note fields is checked, the first three lines of the formatted note appear instead. If Expand (checkbox) is checked, the entire note appears. |
| Show All | Applies to transactions. If unchecked, shows only the notes for the transaction. If checked, shows all the notes for the customer or supplier. |
| Preview (Attachments) | Checkbox. If checked, shows a preview of image attachments only, instead of listing the attachments. |
| Search | Enter text in the search box above the notes or above the attachments to show only the notes or attachments that contain it. The search box always appears. |
Fields Explained
| Section | Information |
|---|---|
| Notes | The notes are listed newest first. Each note has one bold line with:
Below the bold line is the note or a truncated version of the note (if Expand is unchecked). If the General Setting General > Enable Rich-Text in Note fields is checked, the note is shown formatted (bold, colours and lists are kept). If it is unchecked, the note is plain text, and a formatted (HTML) note shows no tags. The notes lists of the item edit view (Notes tab), the asset edit view (Notes & Attachments tab) and the Service Manager use the same layout. Double-click a note to open it in the Edit Note window. A right-click context menu lets you Edit or Delete the note. |
| Attachments (Preview unchecked) |
|
| Attachments (Preview checked) | Shows a preview of image attachments only. |
Notes: Edit View
- Add (button) > Note, Edit and double-clicking a note open the Edit Note window. Before Ver 2.6.0, the note was edited on the panel.
- The same window opens from the item edit view (Notes tab) and the asset edit view (Notes & Attachments tab). The Service Manager keeps its own note window.
- If the General Setting General > Enable Rich-Text in Note fields is checked, the note is entered and formatted in the HTML Editor in the window. If it is unchecked, the window shows the plain text note box.
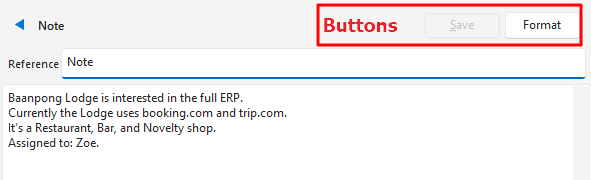
Buttons Explained
| Button | Description |
|---|---|
| Arrows | Navigates to the previous or next note. |
| Save | Saves any changes and closes the note. |
| Clear Formatting | Next to Save. Makes the note plain text again (removes the formatting). The button always appears. On a plain text or read-only note, it changes nothing. |
| Format | Removes extra line breaks. Removed from the panel in Ver 2.6.0. |
| Translate | Appears only in the Edit Note popup of an item in a language other than English. The popup then also shows the English reference and note. Translates the English reference and note into the item’s language, if you confirm the message “Translate Reference and Note from English to” followed by the language name. The translation replaces the reference and note in that language, and the note is saved. If the English note is empty, the message “The English Note is empty.” appears. A formatted English note is shown formatted too, but Translate sends it as plain text, so the translated note is plain text. Format it again in the item’s language if needed. |
Fields Explained
| Field | Description |
|---|---|
| Name | Select or enter the note’s name. |
| Reference | Enter a reference or caption for the note. |
| Notepad | A plain text notepad to enter or paste a note. If the General Setting General > Enable Rich-Text in Note fields is checked, the notepad is the HTML Editor, so the note can be formatted (saved as HTML). |
HTML Editor
- The HTML editor is a word-processor style editor for notes (the Edit Note window, item notes and transaction notes), email messages and email templates (see Email Edit View).
- Notes use the HTML editor only if the General Setting General > Enable Rich-Text in Note fields is checked (unchecked by default). Add the setting with Add/Update (button) after the upgrade to Ver 2.6.0. Until it is checked, notes are plain text.
- Notes written before (plain text) open with their lines kept, and stay plain text until they are edited in the HTML editor.
- The toolbar has the font, size, bold, italic, underline, strikeout, text colour, alignment, lists, indent, hyperlink, and undo and redo.
- When the editor opens, the toolbar shows the font of the General Settings General > Default - Font name for HTML (Calibri by default) and General > Default - Font size for HTML (9 by default), and the cursor starts at the end. New text, and plain text entered in a new note, is shown in this font. Saved notes are not changed until they are edited.
- The editor has no table tools. Tables already in the HTML are kept, and their text can be edited; change the table layout on the Code tab.
Tabs Explained
| Tab | Description |
|---|---|
| Editor | Enter and format the note, using the toolbar. The editor opens on this tab. |
| Code | Shows the note’s HTML. HTML copied from elsewhere can be pasted here. |
Attachments: Edit View
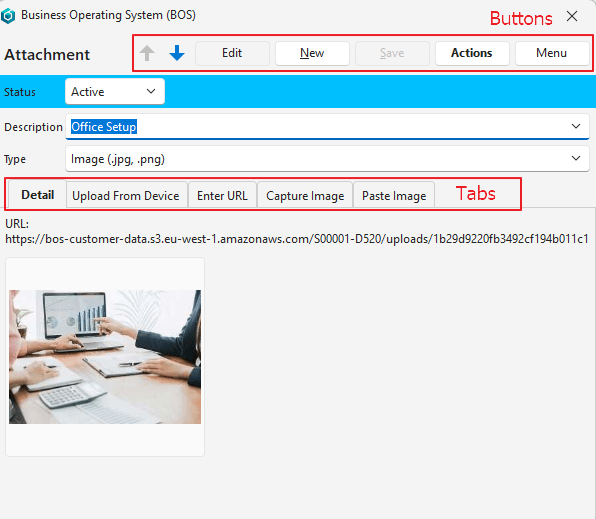
Buttons Explained
| Button | Description |
|---|---|
| Arrows | Navigates between attachments. |
| Edit | Lets you edit the attachment. |
| New | Creates an attachment. |
| Save | Saves any changes and closes the edit popup (uploads are saved automatically). |
| Actions |
|
| Menu | Edit Description Lookup Lists: Edits the lookup lists that can be used instead of entering a description. |
Fields Explained
| Field | Description |
|---|---|
| Status | Select the attachment’s status:
The default is Active. |
| Reminder | A calendar to select a reminder date (e.g. to remind you of an expiry date, or some other related event). Shown only if Actions (button) > Show Dates is checked. |
| Description | Select a description from the lookup list, if one is created. Otherwise, enter a description. |
| Type | Select the type of attachment from the dropdown list. The options are:
|
| Issued | A calendar for you to select an issue date (e.g. if you upload a certificate and you want to record the date on which the certificate was issued). Shown only if Actions (button) > Show Dates is checked. |
| Expires | A calendar for you to select an expiry date (e.g. if a membership expires). Shown only if Actions (button) > Show Dates is checked. |
Tabs Explained
You can use only one of the tabs below per attachment: upload files, paste a URL or capture an image.
Files uploaded as attachments count towards your storage limit.
| Tab | Description |
|---|---|
| Detail | Displays the URL and a preview if it is an image file. |
| Upload From Device | Drag one or more files here to upload them. A General Setting limits the size of files that can be uploaded this way. The default is 50 KB. Click Select files (button) to browse to the file to upload. |
| Enter URL | If you upload a file, the URL of the uploaded file and its name appear. Alternatively, you can paste or enter a URL in this field. In this case, the file is not uploaded and does not affect your storage allocation on QuickEasy’s server. |
| Capture Image | Uses a connected camera to capture what is in front of the camera.
|
| Paste Image | Paste any image from your clipboard with Ctrl + V, or right-click inside the tab and select Paste.
|