
Asset Edit Views
The asset edit view is where an asset is created and edited. This page describes its buttons and header and the Attributes, Meter, Relationships, Notes & Attachments, Transactions, Services and Depreciation tabs. For an overview of the Assets module, see Assets List Views.
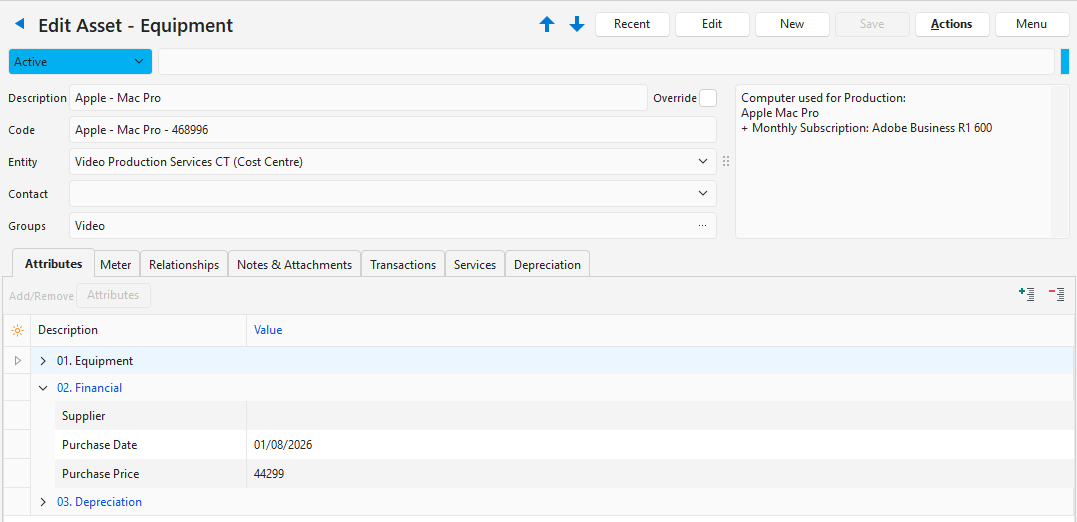
Buttons Explained
An asset opened from another module (for example, with Open Linked Asset on a transaction or a Service Manager job, or after Create an Asset) opens in a modal form (a popup with fewer options than the full screen). In the modal form:
- The New, Actions and Recent buttons are hidden.
- The Menu button has only Open in Assets Module and Layout.
| Button | Description |
|---|---|
| Arrows | Navigates to the next or previous entry. |
| Recent | A dropdown list of recently viewed records, for quick access. The button is hidden when there are no recent items. |
| Edit | Edits the entry. |
| New | Creates an asset of the type selected. The available types are:
|
| Save | Saves any changes. |
| Actions |
|
| Menu | View/Edit Notes & Attachments: Lets you view, edit and create notes and attachments. Open in Assets Module: Appears only when the asset is opened from another module. Saves any changes, closes the popup and opens the asset in the Assets module. Settings
|
Header Explained
| Field | Description |
|---|---|
| Status | Select from a dropdown list of statuses. |
| Status Note | Enter a status note. |
| Description | Enter a description. If auto-generated, the description is created as follows:
|
| Code | Enter a brief description or code. Only the code is used in asset lookups on transactions or service tickets. If auto-generated, the code is created as follows:
|
| Override | Checkbox. If checked, you can edit the description and code (in the edit view). |
| Entity | Select from a dropdown list of entities. |
| Contact | Select from a dropdown list of contacts. |
| Groups | Click the three dots (…) to add groups (categories) to the asset. |
| Note | Enter a note. |
Attributes (tab)
- Fixed attribute sets are automatically added for equipment and vehicles.
- You can add other fixed attribute sets (e.g. Financial and Depreciation).
- You cannot change the fields of a fixed attribute set; you can only enter their values.
- You can create custom attributes for other information (Menu (button) > Edit Attributes).
- To create a lookup list for an attribute, right-click the entry and select Edit Lookups. Otherwise, enter the values directly.
Buttons Explained
| Button | Description |
|---|---|
| Attributes | |
| > Add | Lists the attributes you can add. |
| > Remove | Lists the attributes you can remove. |
| Expand | Opens all the attribute sets. |
| Collapse | Closes all the attribute sets. |
Fields Explained
| Field | Description |
|---|---|
| Equipment Attributes | |
| Serial No. | Enter the machine’s serial number. |
| Make | Enter the machine’s make. |
| Model | Enter the machine’s model. |
| Year of Manufacture | Enter the year of manufacture. |
| Colour | Enter the asset’s colour. |
| Vehicle Attributes | |
| VIN (Vehicle Identification Number) | Enter the vehicle’s identification number. |
| Engine No. | Enter the vehicle’s engine number. |
| Registration No. (Licence Plate) | Enter the vehicle’s registration number. |
| Make | Enter or select the vehicle’s make. |
| Model | Enter or select the vehicle’s model. |
| Year of Manufacture | Enter the vehicle’s year of manufacture. |
| Body Type | Enter or select the vehicle’s body type. |
| Colour | Enter or select the vehicle’s body colour. |
| Financial Attributes | |
| Supplier | Select from a dropdown list of suppliers. |
| Purchase Date | Select the date on which the asset was purchased. |
| Purchase Price | Enter the asset’s purchase price.
|
| Depreciation Attributes | |
| Status | Select the depreciation status:
The status here is the depreciation status, not the asset’s own status (which depreciation does not change):
|
| Starting Date | Select the date from which the asset is depreciated. If the starting date is after the first day of the month, the first month’s depreciation is calculated for the remaining days of that month only. |
| Starting Value | Enter the asset’s value at the starting date (e.g. its purchase price). |
| Residual Value | Enter the asset’s value at the end of its useful life. Depreciation stops when the asset’s book value reaches this value. |
| Months | Enter the number of months over which the asset is depreciated. |
| Monthly Cost | The monthly depreciation amount. This field is read-only. It is calculated automatically using the straight-line method: (Starting Value − Residual Value) ÷ Months. It is recalculated whenever one of these values changes. |
| Menu (…) | Right-click an attribute set’s heading for these options, which change the order of the attribute sets:
|
Meter (tab)
- The Meter tab appears on Vehicles and Equipment assets. It is hidden on Other assets. Before Ver 2.5.0, the tab was named Odometer and appeared on Vehicles only.
- Fields marked in blue (✎) can be edited if the entry is not linked to a service ticket. If the entry is linked to a service ticket, it can only be edited on the ticket.
Fields Explained
| Field | Description |
|---|---|
| Field Chooser (*) | Add or remove columns. |
| ID | The system-generated number for the entry. |
| Type | The type of reading (Odometer). |
| Ticket No. | The linked service ticket’s number. |
| Date | The reading’s date. This field can only be edited if the reading was captured directly (not transferred from the linked service ticket). |
| Reading | The meter reading (for example, the odometer reading of a vehicle). This field can only be edited if the reading was captured directly (not transferred from the linked service ticket). |
| Created | The date on which the entry was created. |
| Updated | The date on which the entry was last updated. |
| Updated By | The user who last updated the entry. |
 | A menu with these options:
|
Relationships (tab)
- The Relationships tab links the asset to the asset it belongs to, its parent (for example, a part to its machine).
- Below the Parent field, every asset below this one (its child assets) is shown as a tree: its children, their children and so on.
- A transaction item’s Create an Asset makes the new asset a child of the transaction’s header asset, if the transaction has one (see How to Create an Asset From a Transaction).
- Linking and unlinking assets saves the asset’s unsaved changes first. Both are unavailable when the asset is read-only (user access).
- An asset cannot be linked below itself. A link that would make an asset its own parent shows the message “An Asset can not be linked below itself.” and is not saved.
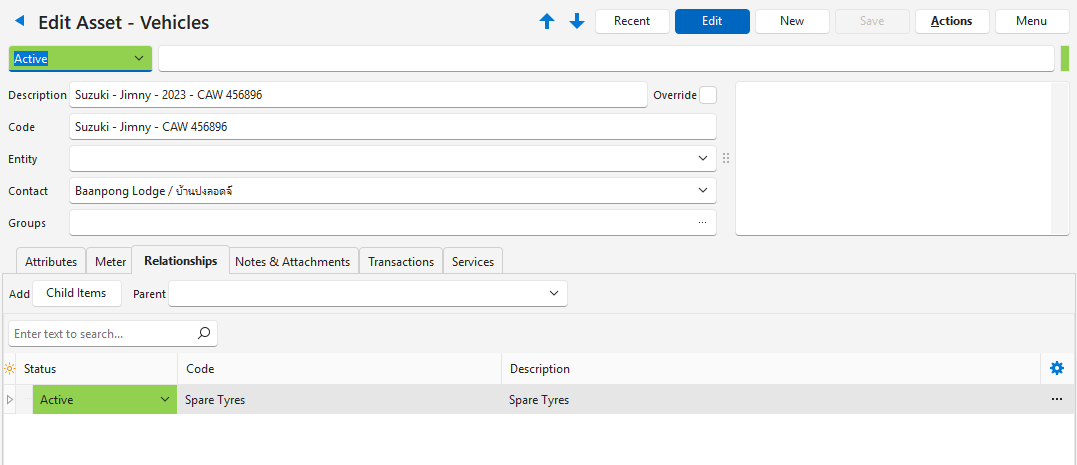
Button Explained
| Button | Description |
|---|---|
| Child Items | Next to Add. Opens the Link Existing Asset window, where you select one or more assets to become direct child assets of this asset. The asset itself, its parents and its direct child assets are not listed. |
Fields Explained
| Field | Description |
|---|---|
| Parent | Select the asset that this asset belongs to. The dropdown list shows each asset’s description, code and parent. The asset itself and its child assets are not listed. Press Delete to clear the parent. |
| Code | The child asset’s code. |
| Description | The child asset’s description. |
| Status | The child asset’s status. |
| Type | The child asset’s type. |
| Entity | The child asset’s entity. |
| Contact | The child asset’s contact. |
| Menu (…) | Right-click a child asset, or click its three dots (…), for these options:
|
Notes & Attachments (tab)
- The tab lists the notes and attachments linked to the asset, laid out as on the Service Manager’s Notes & Attachments tab: the notes at the top and the attachments below.
- A note or attachment added to a transaction or a Service Manager job that is linked to the asset is linked to the asset too, so it also appears here (see Notes and Attachments Panel).
- To add, edit or delete notes and attachments, click Edit (button) first. The Note and Attachment buttons, Delete Note, Edit Attachment and Delete Attachment are unavailable without edit access to assets, and on an asset with a status in the Cancelled Status Group.
Notes
Buttons Explained
| Button | Description |
|---|---|
| Note | Next to Add. Adds a note and opens it in the Edit Note window, so that you can enter its reference and text (see Notes: Edit View). |
Filters Explained
| Filter | Description |
|---|---|
| Expand | If checked, each note appears in full. If unchecked, a shortened preview of each note appears: the first 255 characters on one line, or the first three lines of a formatted note when the General Setting General > Enable Rich-Text in Note fields is checked. |
Fields Explained
| Field | Description |
|---|---|
| Notes | The notes are listed newest first, in the same layout as the Notes and Attachments Panel. Each note shows one bold line with the module and number it was added to, its reference, the user who created it and the date and time it was created, then the note (or its preview if Expand is unchecked). If the General Setting General > Enable Rich-Text in Note fields is checked, the note is shown formatted (bold, colours and lists are kept). If it is unchecked, the note is plain text, and a formatted (HTML) note shows no tags. Double-click a note to open it. |
| Menu (…) | Right-click a note, or click its three dots (…), for these options:
|
Attachments
Buttons Explained
| Button | Description |
|---|---|
| Attachment | Next to Add. Adds an attachment if confirmed and opens it, so that you can upload a file or enter a link (see Attachments: Edit View). The Description filter is set to All, so that the new attachment is listed. |
Filters Explained
| Filter | Description |
|---|---|
| Description | Select a description to show only the attachments with that description, or All to show every attachment. The list is the attachment Description lookup list, as in the Attachments Module. |
Fields Explained
| Field | Description |
|---|---|
| Field Chooser (*) | Add or remove columns. To keep the columns, save the layout (Menu (button) > Layout > Save). |
| Status | The attachment’s status. |
| Name | The attachment’s name. |
| Description | The attachment’s hyperlinked description, its type, the user who created it and the date it was created. Click the description to open the attachment. |
| Issued | The attachment’s issued date. |
| Expires | The attachment’s expiry date. |
| Reminder | The attachment’s reminder date. |
| Created | The date on which the attachment was created. |
| Updated | The date on which the attachment was last updated. |
| Updated By | The user who last updated the attachment. |
| Menu (…) | Right-click an attachment, or click its three dots (…), for these options:
|
Transactions (tab)
- The tab lists all the transactions linked to the asset (the transactions with this asset in their Asset field), grouped by Transaction Type, with the newest first in each group.
- Cancelled and deleted transactions are not listed.
- A transaction can be linked to an asset on Transaction Types with Enable Assets.
- A copy of a transaction (for example, a Sales Order copied to a Purchase Order) keeps the asset, so it is listed here too, even when the asset is not linked to the copy’s customer or supplier.
Fields Explained
| Field | Description |
|---|---|
| Field Chooser (*) | Add or remove columns. |
| ID | The system-generated number for the transaction. |
| Trans No. | The number of the transaction, shown in the colour of the transaction’s status. Double-click the entry to open the transaction. |
| Date | The transaction’s date. |
| Reference | The transaction’s reference. |
| Total | The transaction’s total. |
| Menu (…) | Right-click the entry, or click its three dots (…), for this option:
|
Services (tab)
- The tab lists all the Service Manager jobs linked to the asset (the jobs with this asset in their Asset field), with the newest first.
- Cancelled and deleted jobs are not listed.
Fields Explained
| Field | Description |
|---|---|
| Field Chooser (*) | Add or remove columns. |
| ID | The system-generated number for the job. |
| Ticket No. | The number of the job, shown in the colour of the job’s status. Double-click the entry to open the job. |
| Date | The date on which the job was created. |
| Category | The job’s category, followed by its Service Type in brackets. |
| Reference | The job’s reference. |
| Menu (…) | Right-click the entry, or click its three dots (…), for this option:
|
Depreciation (tab)
Before Ver 2.5.0, the Depreciation tab was named Transactions. The Transactions tab now lists all the transactions linked to the asset (see Transactions (tab)).
The Depreciation tab appears only on assets that have the Depreciation attribute set. It lists the depreciation postings linked to the asset: the items that Actions (button) > Depreciation > Add Depreciable Assets added to a transaction (see Setup Example – Depreciation Journal).
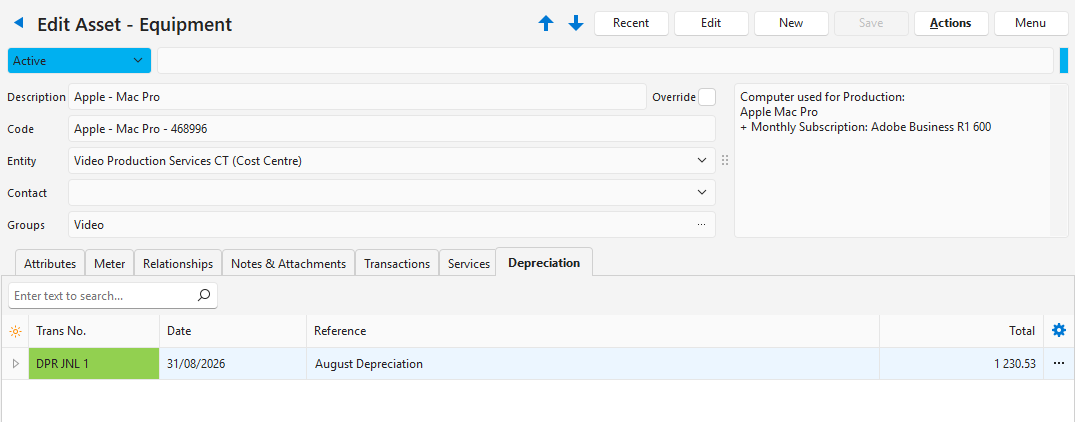
Fields Explained
| Field | Description |
|---|---|
| Field Chooser (*) | Add or remove columns. |
| ID | The system-generated number for the entry. |
| Trans No. | The number of the transaction, shown in the colour of the transaction’s status. Double-click the entry to open the transaction. |
| Date | The transaction’s date. |
| Reference | The transaction’s reference (e.g. August Depreciation). |
| Description | The entry’s description. |
| Total | The entry’s total. |
| Total (CUR) | The entry’s total in the transaction’s currency. The abbreviation CUR is replaced by the currency’s code (e.g. Total (EUR)). |
| Created | The date on which the entry was created. |
| Updated | The date on which the entry was last updated. |
| Updated By | The user who last updated the entry. |
| Click it, or right-click the entry, for this option:
|