Setup Example – Customer Credit Notes
- Customer Credit Notes reduce customer accounts when customers return goods, or when you agree to a refund or price reduction after an invoice is finalised.
- In this example, the customer is credited and the Sales account is debited (Cr Customer, Dr Sales).
- Manually created credit notes can include pre-created items that have selling prices, or custom entries.
- For custom entries, the person creating the credit note must enter the description and prices.
- Typically, credit notes are copied from Customer Invoices to ensure the same accounts are debited and credited.
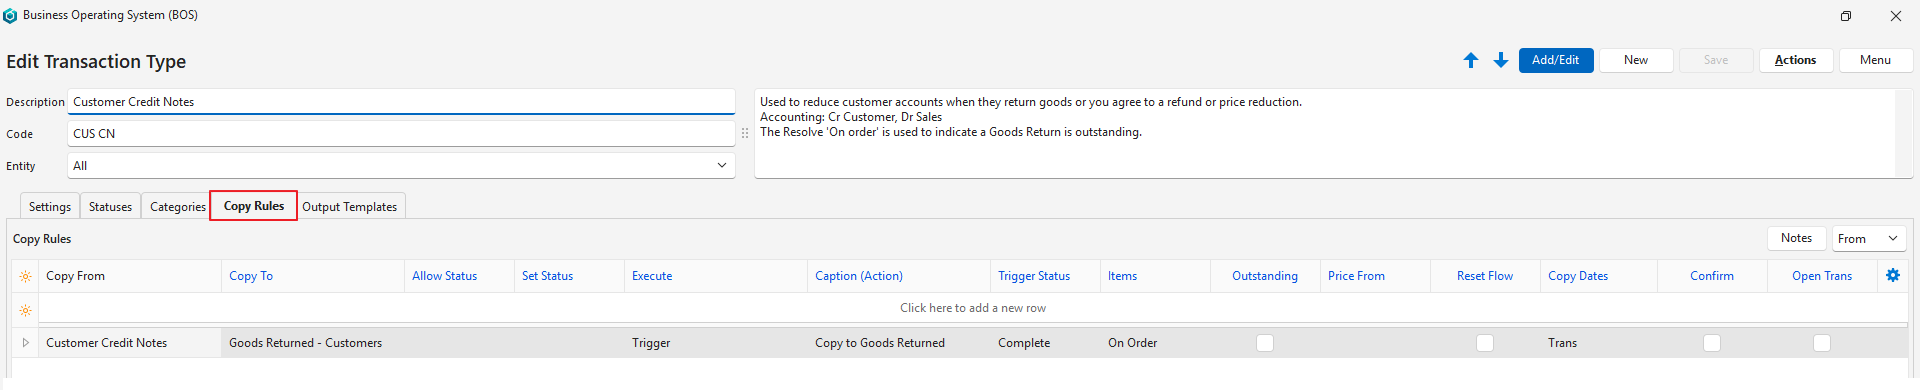
- The On Order resolve indicates that a goods return is outstanding. When the credit note is Complete, its On Order items are copied to Goods Returned – Customers automatically.
💡This page provides an example of a Transaction Type setup for Customer Credit Notes.
Header
- Description: Customer Credit Notes
- Code: CUS CN
- Entities: All
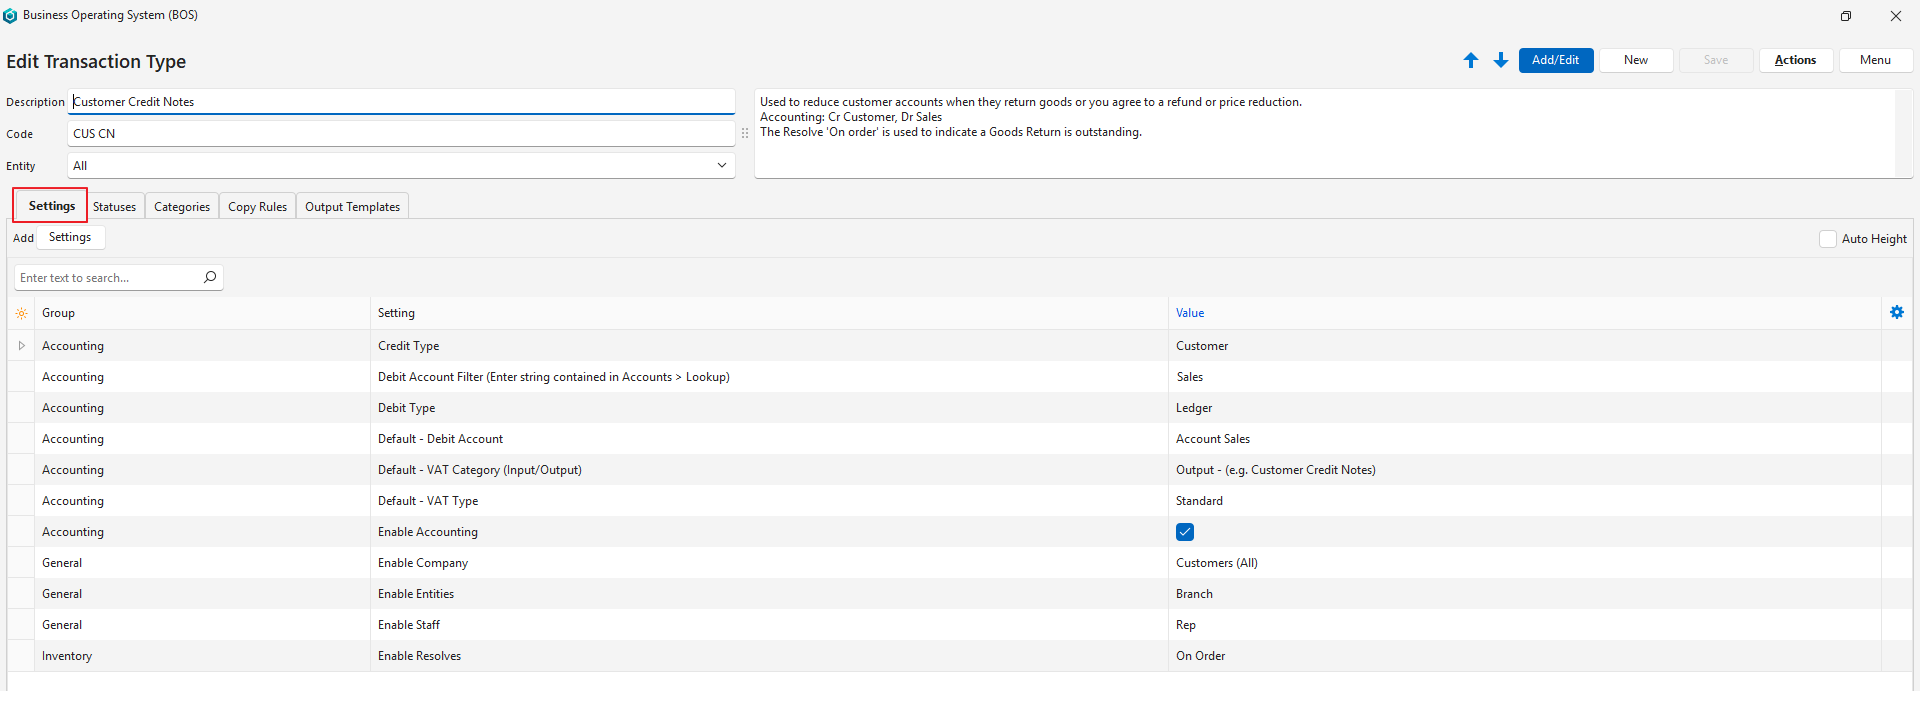
Settings (tab)
- This section lists the compulsory and optional settings that can be used to customise Customer Credit Notes.
- Settings with Default as part of the name can be changed when capturing a transaction.
| Setting | Description | Value | When Required |
|---|---|---|---|
| Accounting > Credit Type | Select from a dropdown list of account types. The options are:
| Customer | Always |
| Accounting > Currencies | Select which currencies apply to the Transaction Type. The options are:
| Select an option from the dropdown list (e.g. Company Currency). | If customers are invoiced in multiple currencies. |
| Accounting > Debit Account Filter (Enter string contained in Accounts > Lookup) | Limits the accounts that can be selected to those that include the letters entered. The filter is case-insensitive. | Sales | If you want to limit the accounts that can be selected. Requires all your sales accounts to include the word Sales in the lookup field. |
| Accounting > Debit Type | Select from a dropdown list of account types. The options are:
| Ledger | Always |
| Accounting > Default – Debit Account | Select a default account from the dropdown list. | Account Sales | If you want to specify the sales account to debit. |
| Accounting > Default – VAT Category (Input/Output) | Select a VAT Category from these options:
| Output – (e.g. Customer Credit Notes) | Always if you are registered for VAT. |
| Accounting > Default – VAT Type | Select a default VAT Type for the Transaction Type from a dropdown list of all the created VAT types. | Select the Standard VAT Type. | Always if you are registered for VAT. |
| Accounting > Enable Accounting | A checkbox. If checked, accounting is enabled. If unchecked, transactions are created in the module and not posted to the ledger. | Check the box. | Always |
| Defaults > Default – Data Filter | The default filter when you view a list of transactions for the Transaction Type (e.g. This Month, Pending). | Select an option from the dropdown list. | The default value is Pending & Active. Add this setting if you want a different default filter. |
| General > Add Items from the following Categories | Limits the items that can be added to those in the selected categories. Click Edit in the Value column and select the categories. | Click Edit. Move the categories from the Available to the Selected section to include them. Move the categories from the Selected to the Available section to exclude them. | If you create credit notes manually (as opposed to copying them from invoices) and you want to limit the categories that can be used. |
| General > Add to Followers | Select Follower options from the dropdown list. Multiple options can be selected:
| Check all the boxes that apply. | Applies if you email credit notes. Followers must be entered as contacts or users and have email addresses. |
| General > Contact Lookup | Select which contact fields to include when you select a contact for a transaction from the dropdown list. The options are:
| Select an option from the dropdown list. | Add the setting if you want to select the contact by position or location. |
| General > Enable Assets | Checkbox. If checked, you can select an asset from a dropdown list. | Check the box. | Add the setting if you use assets to generate income (e.g. you service or repair assets for customers). |
| General > Enable Company | Select what type of company should be in the header:
| Customers (All) | Always |
| General > Enable Entities | Select an option from this list:
| Branch | If you allocate transactions to branches. |
| General > Enable NCR (Problem) | Checkbox. If checked, transactions can be marked as problem transactions for NCR purposes. | Check the box. | If you use the NCR features. For example, if there was a problem with an order and you issue a credit note for it, this feature helps you track the costs of the mistake. |
| General > Enable Staff | Select how transactions are assigned:
| Rep | Add the setting to allocate the credit note to a rep, staff member, or both. |
| General > Reference Lookup | Enter Reference lookup lists. | Click the Value column. Enter a reference, one entry per line. Check Auto Height to show the full list. | If you create credit notes manually and you want staff to select a reference instead of entering one. If customer invoices are copied, the reference field is also copied. |
| General > Transaction Number | Specifies how transaction numbers are allocated when the Transaction Type is first created. The options are:
A warning appears on the orange warning bar if a duplicate transaction number is entered.
This setting cannot be changed if there are transactions. | Select an option from the dropdown list (e.g. Generate (Entity)). | Add this setting if you use multiple entities that each have their own VAT registration numbers. |
| Inventory > Enable Resolves | Specify what must happen to inventory items. The options are:
| On Order | If you use inventory management. In this example, On Order indicates that the returned goods are still to be received on a Goods Returned – Customers transaction. |
| Transaction Items > Enable Adding Items | Specify which type of items can be added to a transaction. The options are:
All the buttons to add items still appear. A disabled feature shows an error message when clicked. | Select one of these options:
| If you create credit notes manually (as opposed to copying them from invoices), you can add the setting to limit the items that can be added to a credit note. |
Statuses (tab)
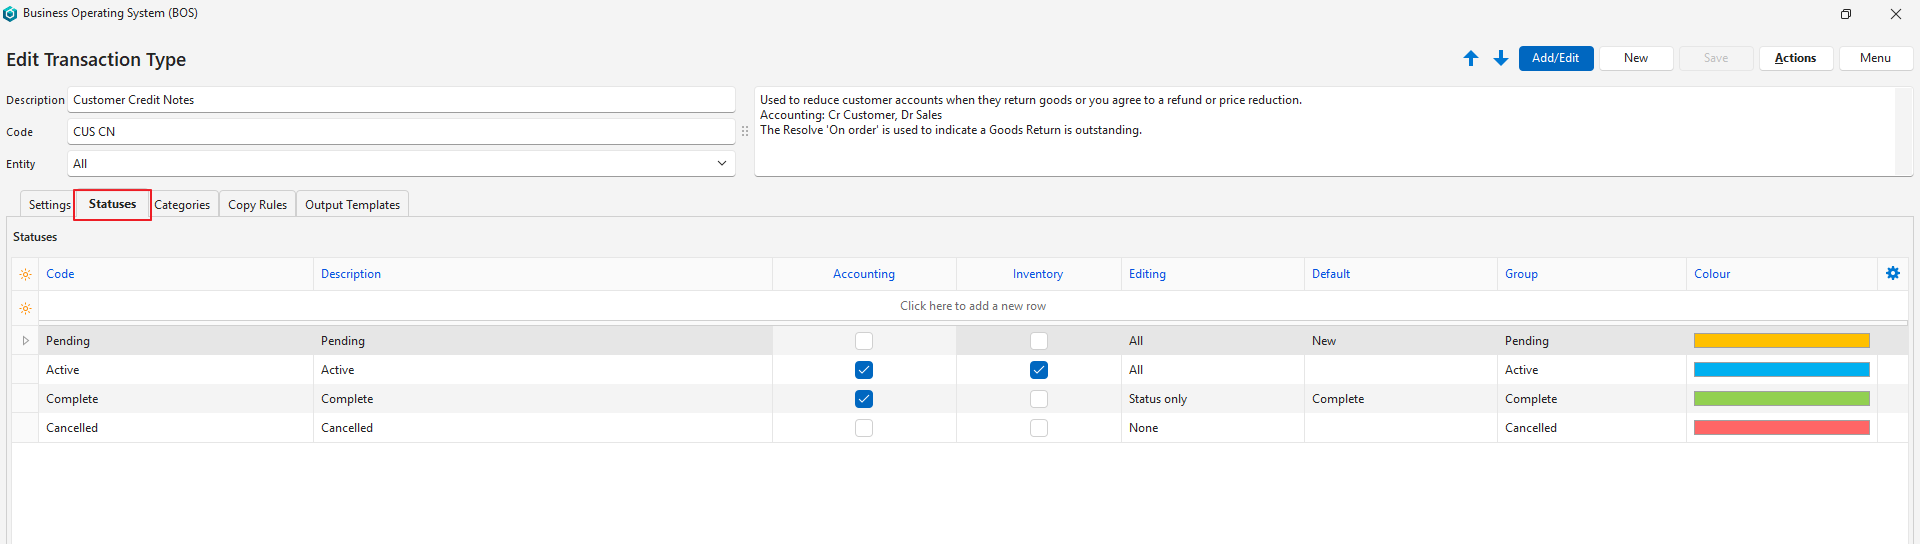
- You may create an unlimited number of statuses.
- However, there are only four Status Groups:
- Pending
- Active
- Complete
- Cancelled
- The first status should allow editing.
- The final status should ideally not allow editing.
- If the setting Accounting > Enable Accounting is checked, at least one status should have the Accounting column checked.
- If inventory is used, at least one status should have the Inventory column checked.
- If editing is allowed when the inventory or accounting columns are checked, any accounting or inventory reports should be considered provisional.
Categories (tab)
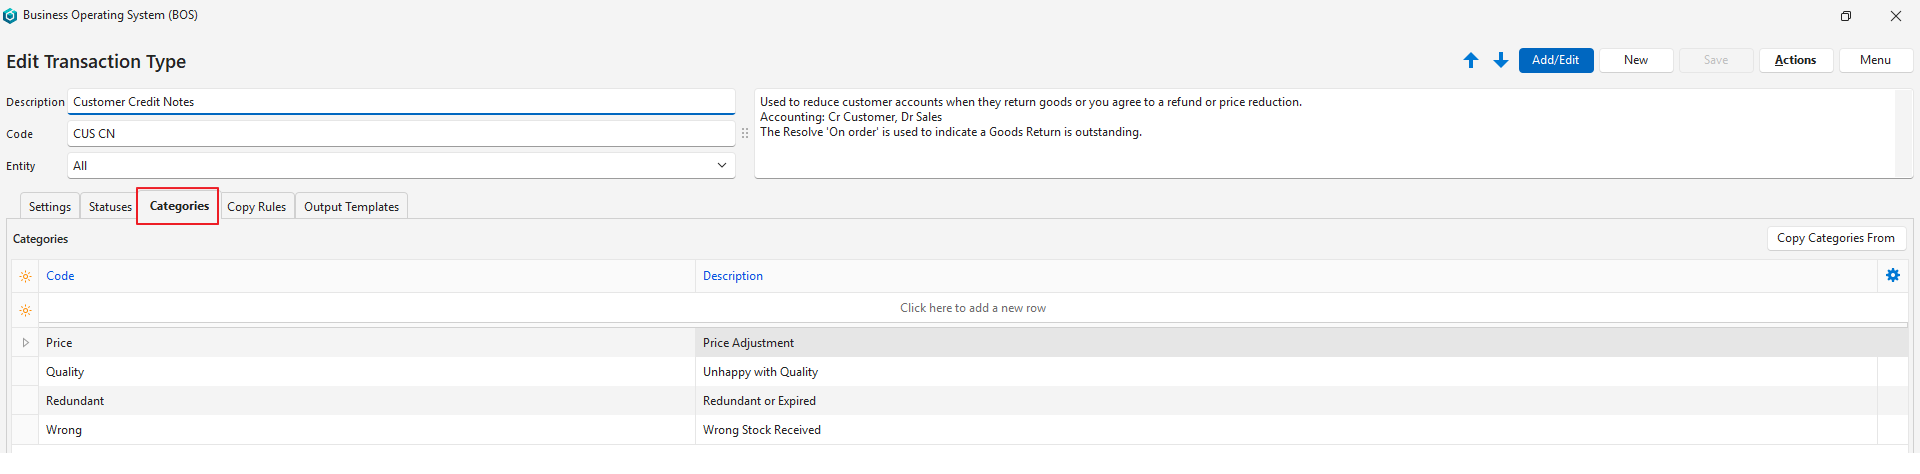
- Use categories to sort records.
- The categories you choose should be meaningful to your business.
- Using categories is optional but recommended.
- Categories can be copied from another Transaction Type. The existing categories are replaced by the copied categories.
Copy Rules (tab)
- Copy Rules determine when transactions may be copied.
- Although two transactions are involved in the copy, you only need to create one Copy Rule.
- User access must be set for each Copy Rule.
- You can automate copying transactions by selecting a Trigger status.
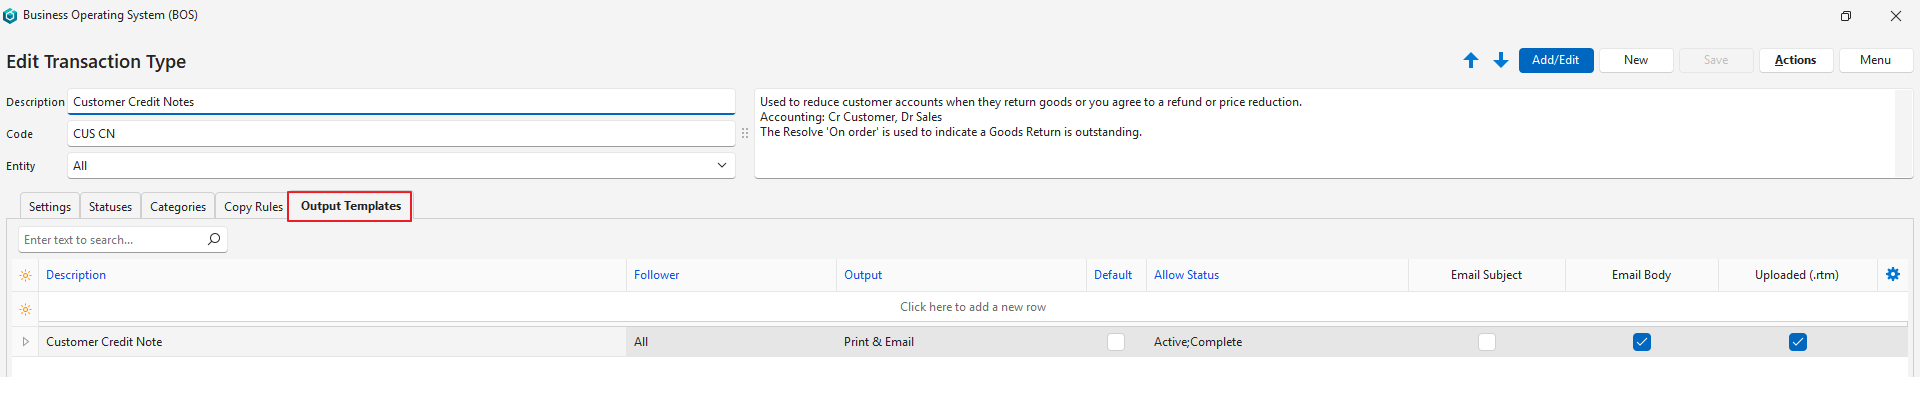
Output Templates (tab)
- Output Templates are the forms you need to print, preview or email a transaction (e.g. invoices).
- Default templates are included. They automatically show your company name, logo and bank details, as filled in on the Output tab of a registered entity.
- You may edit these templates to include or exclude information.
- You may also create your own forms and templates from scratch.