
Calendars and Transactions
Calendars can be integrated with transactions at item level, so that you can track transaction items (e.g. tasks to be performed, goods to be made) on a calendar.
💡These tutorials explain how to set up transactions to use calendars, and how to access calendars from transactions.
How to Set Up Transaction Types to Use Calendars
Note
Calendar Types must be created before you can complete these settings.
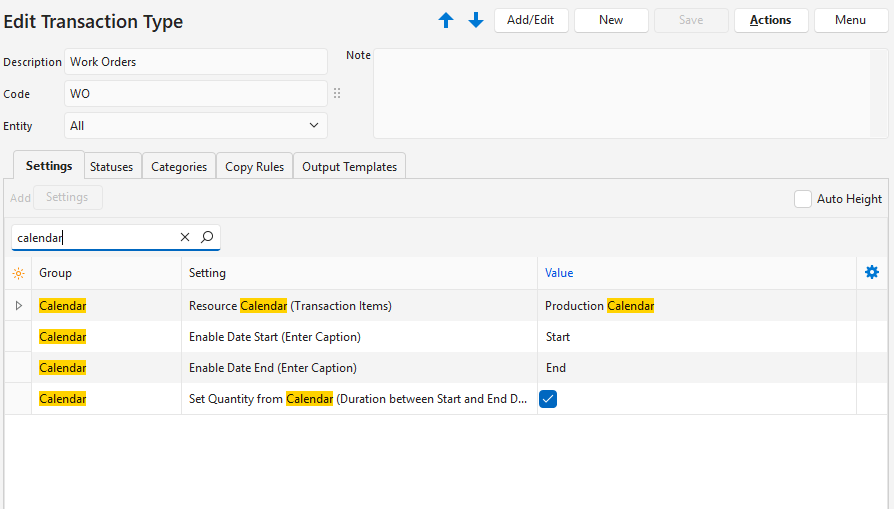
- Edit a Transaction Type.
- Add these settings:
- Calendar > Enable Date End (Enter Caption): Enter a custom caption for the end date.
- Calendar > Enable Date Start (Enter Caption): Enter a custom caption for the start date.
- Calendar > Resource Calendar (Transaction Items): Select a Calendar Type from the dropdown list.
- Calendar > Set Quantity from Calendar (Duration between Start and End Dates): Check the box to adjust the quantity based on the start and end dates (optional). This feature works as follows:
- Update Start Date: The quantity is updated.
- Update End Date: The quantity is updated.
- Update Qty: The end date is updated.
How to Edit Transactions to Display on the Calendar
Note
- The calendar works with the individual items and not the due, required or payment dates entered on the status bar.
- All the calendar fields must be filled in before the entry appears on the calendar.
- Transactions cannot be edited from the calendar but can be opened from the calendar. Once opened, normal editing rules apply (e.g. the transaction must have a status that allows editing).
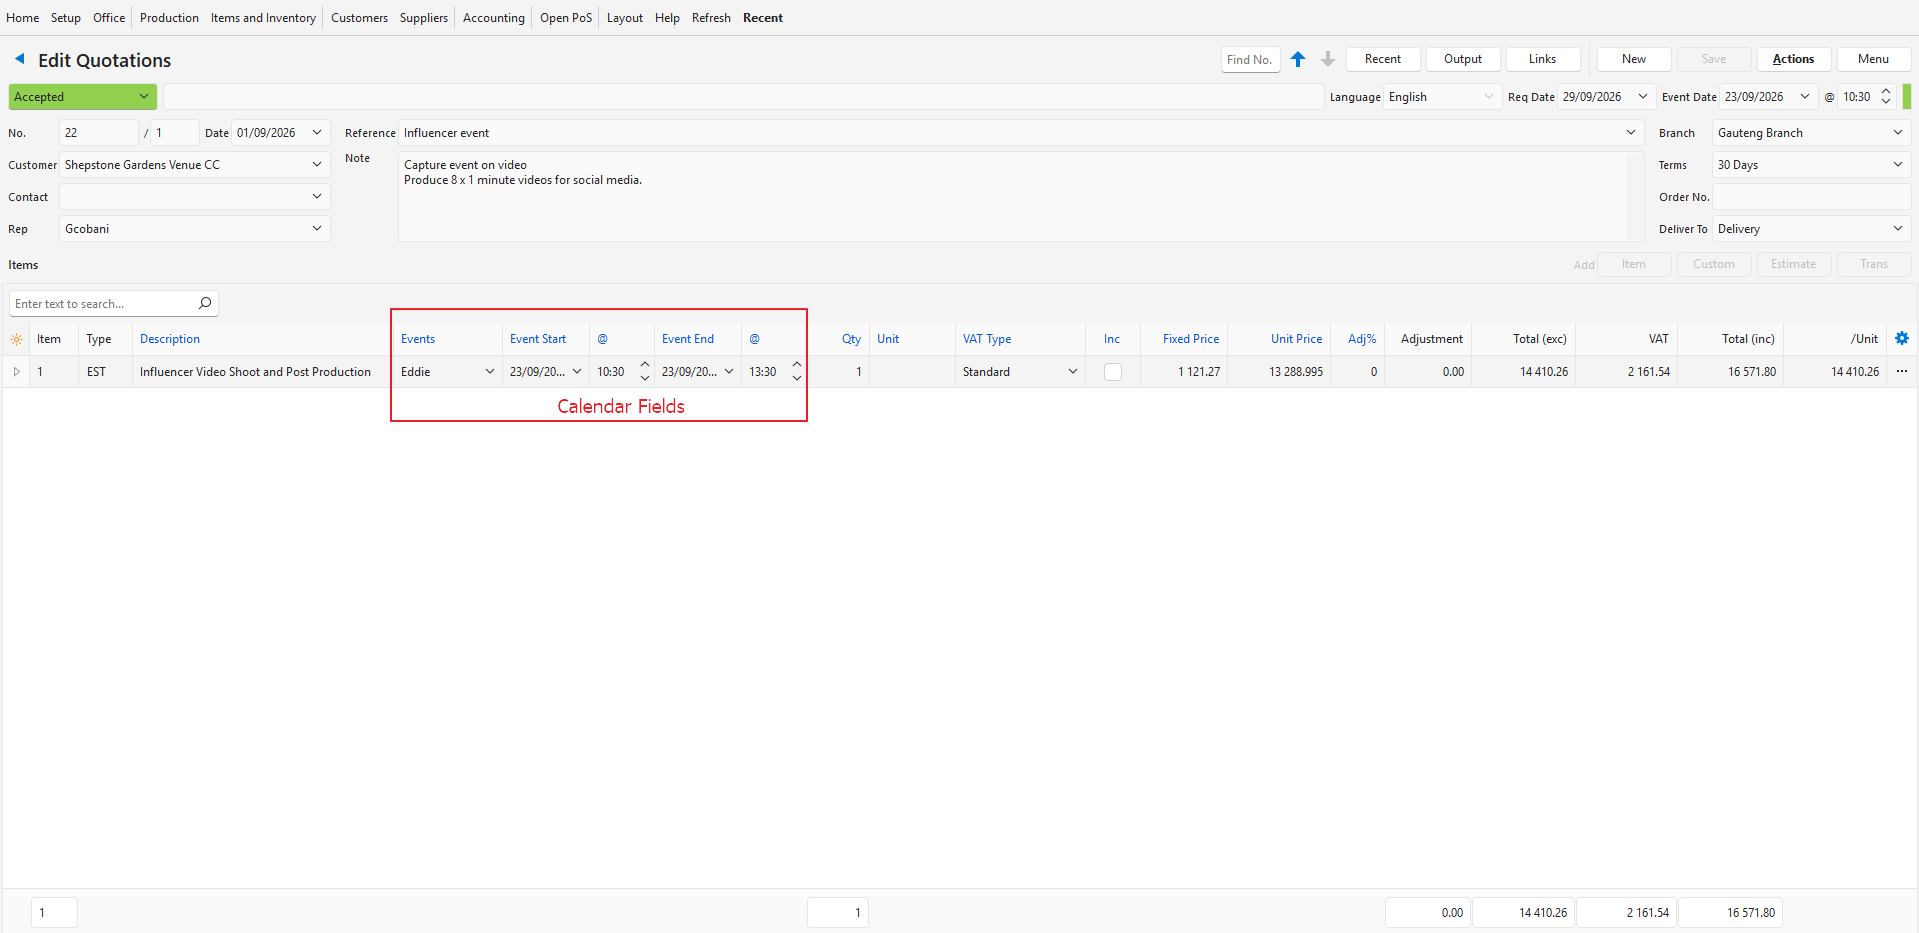
- Create or edit a transaction.
- Use Field Chooser (*) in the first column to add these columns:
- Calendar End (where End is the caption entered in Step 2a of How to Set Up Transaction Types to Use Calendars)
- Time End
- Calendar Start (where Start is the caption entered in Step 2b of How to Set Up Transaction Types to Use Calendars)
- Time Start
- Transaction Calendar
- For every item, complete these fields:
- Calendar Start = Select a start date on the calendar. This date must be earlier than the end date.
- Time Start = Select a start time.
- Calendar End = Select an end date on the calendar. This date must be later than the start date.
- Time End = Select an end time.
- Transaction Calendar = Select the contact or asset from the dropdown list (the resource that is performing the task).
How to Navigate to a Calendar From a Transaction
- Create or edit a transaction.
- Click Menu (button) > Open Calendar.
- Note: The calendar opens in the right-side panel. If the option is not there, calendars are not correctly set up for that Transaction Type.