
Mobile App Customers Interface
The Customers tile opens the Customer Relationship Manager (CRM). It lets you view and update your customers from anywhere. Changes are saved to QuickEasy BOS and appear in the desktop app’s Customers module.
What you can do depends on your User Access to the desktop app’s Customers module:
| Access | What it allows in the Mobile App |
|---|---|
| View | The Customers tile and the customer records. Without it, the tile does not appear. |
| New | The + buttons that add customers, addresses, contacts, attributes, notes and images. |
| Edit | The Edit Information, Edit Address, Edit Contact, Edit Attribute and Edit Note buttons. |
| Delete | The Remove Attribute button. |
Buttons you have no access to do not appear. If you try an action you have no access to, the message “You do not have permission to perform this action” appears.
In the Mobile App pages, “tap” means tap on a touch screen or left-click with a mouse.
Customer List
| Item | Description |
|---|---|
| Search companies or contacts… | Enter part of a name to show only the customers that match. |
| Customer rows | Lists the customers in alphabetical order. Each row shows the customer’s initials, name, status, telephone number and categories. Tap a row to open the customer’s record. |
| + (button) | Appears at the bottom right. Opens the New Customer window to add a customer. |
Customer Record
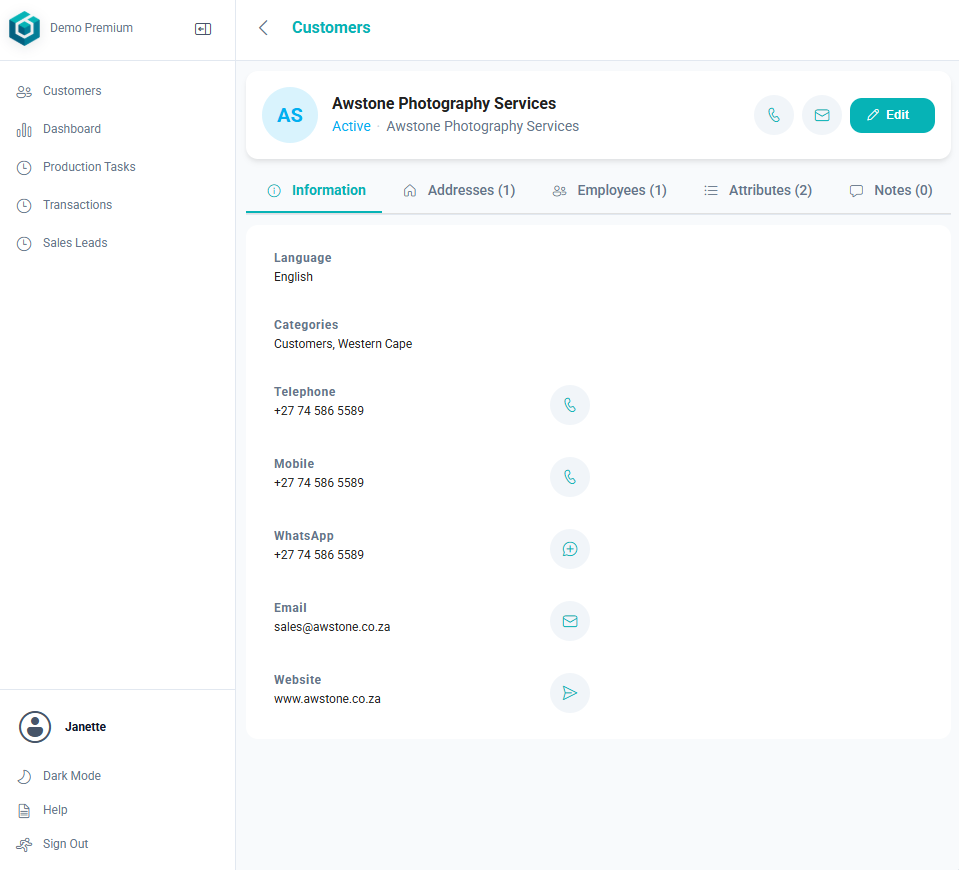
The top of the record shows the customer’s initials, name, status and Known As name, with these buttons:
| Button | Description |
|---|---|
| Call customer (telephone icon) | Calls the customer’s telephone number on a device that can make calls. If there is no number, the message “Telephone number not found” appears. |
| Send email (envelope icon) | Opens a new email to the customer in your email app. If there is no email address, the message “No email provided” appears. |
| Edit Information (pencil icon) | Opens the Edit Customer window. |
Tabs
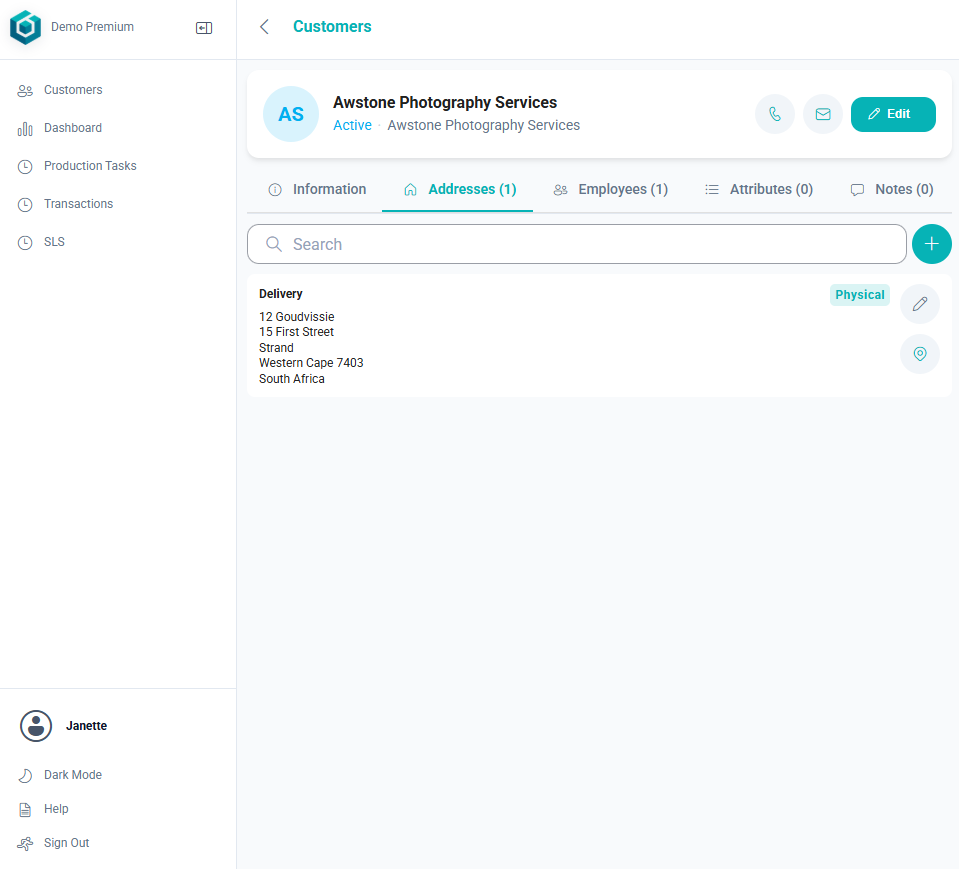
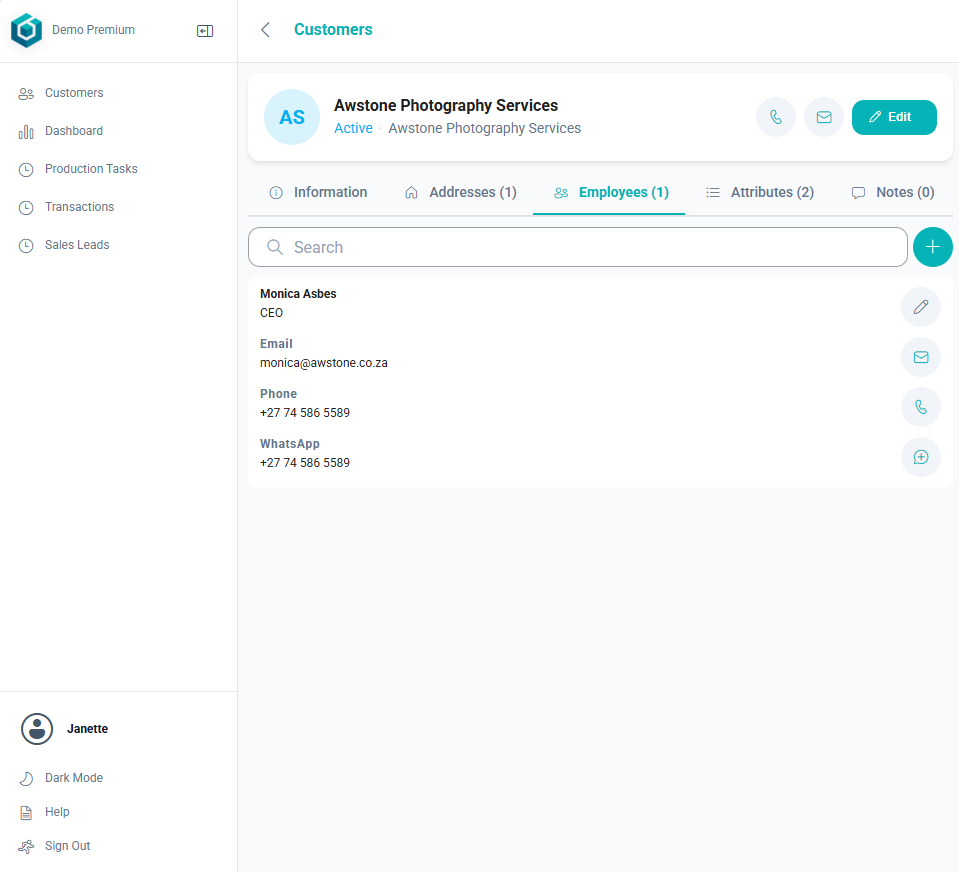
The number in brackets after a tab’s name is the number of entries on it.
| Tab | Description |
|---|---|
| Information | Shows the customer’s Language, Categories, Reg No., Telephone, Mobile, messaging app ID, Email and Website. Only the fields with a value appear. Buttons next to the telephone, mobile, messaging app ID, email and website let you call, open a chat, email or open the website. The messaging app field is named after the General Settings setting Contacts > Messaging App (e.g. WhatsApp), and its button is Open WhatsApp (or the name of your app). |
| Addresses | Lists the customer’s addresses. A tag shows whether an address is the physical or postal address. Each address has an Edit Address button and an Open in Google Maps button. The + button adds an address. |
| Employees | Lists the customer’s contact people with their position, email address, phone number and messaging app ID. Each contact has Edit Contact, Email Contact, Call Contact and Open WhatsApp (or the name of your messaging app) buttons. The + button opens a menu: Add Contact adds a new person; Select Contact links a person who is already in QuickEasy BOS. |
| Attributes | Lists the customer’s attribute groups (e.g. Customers, Currency and Tax) as cards. Tap a card’s heading to open or close it. Each card has an Edit Attribute button. A group that can be added more than once also has a Remove Attribute button. The + button adds an attribute group. The customer’s status appears but cannot be changed here. |
| Notes | Lists the customer’s notes. A long note can be expanded and collapsed. Each note has an Edit Note button. The + button adds a note. |
| Attachments | Lists the images and files attached to the customer. Tap one to open it. The + button adds an image. |
Every tab except Information has a Search box that shows only the entries that match.
The messaging app button opens a chat in the app named in the General Settings setting Contacts > Messaging App. It works for WhatsApp, LINE, Messenger (Facebook), Instagram, Telegram, Viber, WeChat, Signal and Zalo.
For any other app, the button opens the ID if it is a full web link (starting with http:// or https://). Otherwise, it copies the ID so you can paste it into the app.
Windows Explained
New Customer and Edit Customer
| Field / Button | Description |
|---|---|
| Company Name | Enter the customer’s name. Required. |
| Status | Shows the customer’s status. It cannot be changed here. |
| Known As | Enter the name the customer is known by. |
| Telephone | Enter the telephone number. |
| Mobile | Enter the mobile number. |
| Enter the email address. | |
| Messaging app (e.g. WhatsApp) | Enter the ID for the messaging app: for WhatsApp, Viber or Signal, the phone number with the country code (e.g. +27 82 123 4567); for apps such as Telegram, Instagram or LINE, the user name. The field is named after the General Settings setting Contacts > Messaging App. |
| Website | Enter the website address. |
| Reg No. | Enter the company registration number. |
| Language | Select the customer’s language. Required; English is selected by default. |
| Categories | Select one or more categories. |
| Add / Save | Saves the customer. After you add a customer, their new record opens. |
| Cancel / Close | Closes the window without saving. |
Address
| Field / Button | Description |
|---|---|
| Description | Select or enter a description of the address (e.g. Head Office). |
| Line1 / Line2 | Enter the street address. |
| City | Select or enter the city. |
| State/Province | Select or enter the state or province. |
| Code | Select or enter the postal code. |
| Country | Select or enter the country. |
| Add / Save | Saves the address. |
| Cancel / Close | Closes the window without saving. |
For the fields where you select or enter a value, select an entry from the dropdown list or enter a new one.
Add Contact and Edit Contact
| Field / Button | Description |
|---|---|
| Title | Select or enter the person’s title (e.g. Mr, Dr). |
| Forenames | Enter the person’s first names. |
| Surname | Enter the person’s surname. |
| Name | Enter the person’s full name. Tap FS (button) to fill it in from Forenames and Surname. |
| Known As | Enter the name the person is known by. |
| Position | Select or enter the person’s position. |
| Enter the email address. | |
| Telephone / Mobile | Enter the telephone and mobile numbers. |
| Messaging app (e.g. WhatsApp) | Enter the ID for the messaging app: for WhatsApp, Viber or Signal, the phone number with the country code (e.g. +27 82 123 4567); for apps such as Telegram, Instagram or LINE, the user name. The field is named after the General Settings setting Contacts > Messaging App. |
| Address | Enter the person’s address. |
| Add / Save | Saves the contact. A first name or a name must be filled in. |
| Cancel / Close | Closes the window without saving. |
Select Contact
Lists the people in QuickEasy BOS who are not yet linked to this customer. Enter part of a name in Search to find a person, then tap the person to link them as one of the customer’s employees. Their own details are not changed.
Add Attribute and Edit Attribute
- When you add an attribute, the window first lists the attribute types. Enter part of a name in Search to find one. A type that can be added only once is greyed out if the customer already has it.
- Tap a type. Its fields appear in the same window.
- Fill in the fields and tap Save (button). Close (button) closes the window.
Edit Attribute opens the fields straight away. Remove Attribute asks for confirmation before it removes the group.
Add Note and Edit Note
| Field / Button | Description |
|---|---|
| Reference | Enter a reference for the note. Appears only when you add a note. |
| Note | Enter the note. |
| Add / Save | Saves the note. |
| Cancel | Closes the window without saving. |
Add Image
The app asks for permission to use your camera the first time. Images larger than 1920 × 1080 pixels are reduced in size before they are uploaded.
| Button / Field | Description |
|---|---|
| Choose from Gallery | Opens your device’s files or photos to select an image instead of taking a photo. |
| Capture (shutter button) | Takes a photo. |
| Flip Camera | Switches between the front and back cameras. |
| Close | Closes the window without saving. |
| Description | Appears after you take or choose an image. Enter a description. |
| Retake | Discards the image so you can take or choose another one. |
| Save | Uploads the image to the customer’s Attachments tab. |