
Calendars Interface
- You can track transaction items (e.g. tasks to be performed, goods to be made) and project deadlines using calendars.
- Using calendars, you can manage resources such as labour, equipment, vehicles and booking schedules.
- You can create multiple calendars and customise the settings for each calendar by creating a Calendar Type.
- Once created, a Calendar Type must be added to a Menu Group (any menu) before it can be used.
- User access is set for each Calendar Type separately.
- You can integrate calendars with service tickets, to manage project and production tasks, and with transactions at item level.
Buttons and Filters Explained
| Button | Description |
|---|---|
| Slider | Drag the slider to zoom in or out of the calendar. The zoom is on the time intervals (e.g. from hours to days). |
| Navigator | Checkbox. Check the box to show a list of calendars and a list of entries. Drag the dividing bar between them to show more calendars or more entries. |
| Refresh | Updates the display with recent changes. |
| Menu | Provides the following settings:
|
Calendar Explained
Note
- Orphan events are removed from the calendar when it is opened. For example, if a resource was removed, events allocated to that resource are removed.
- The calendar needs a Resources > Resource Group setting with resources in it. Otherwise, an error bar appears at the top of the calendar with one of these messages:
- “Error: Invalid Setting Resource Group. See Menu button > Settings > Edit Calendar Type.” (no Resource Group is set; changing the Resources > Resource Type setting clears the Resource Group)
- “Error: No Resources are assigned to this Resource Group.” (the Resource Group has no resources)
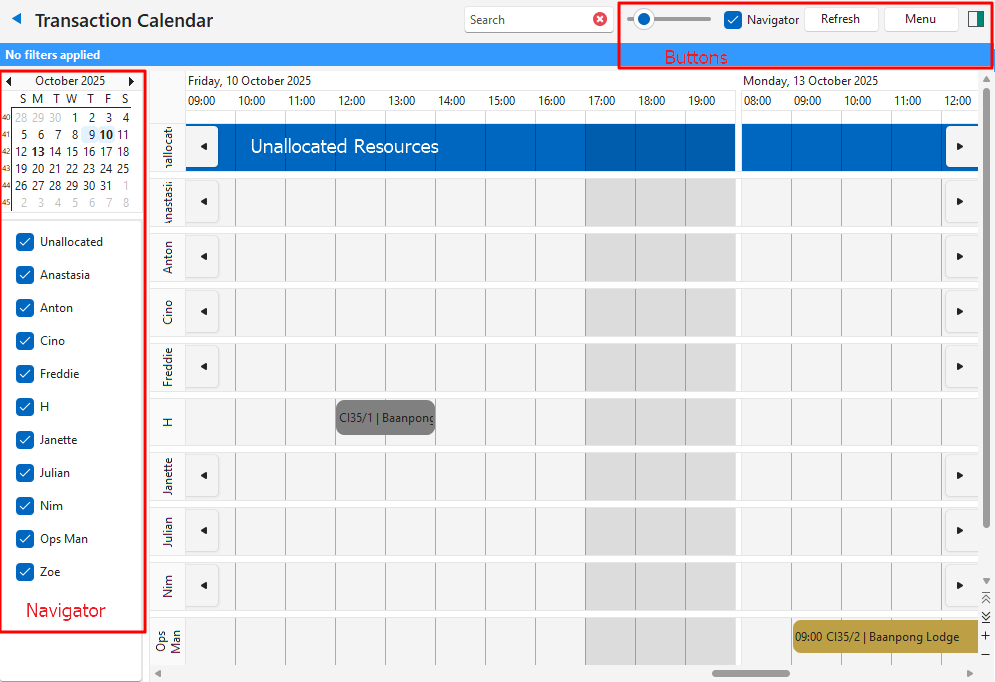
- The intervals (e.g. days, hours) appear on the top as per the Calendar Type setup.
- The resources selected for the calendar appear on the left.
- The current time is shown as a vertical orange line (not shown on the screenshot above).
- Right-click a blank space for these options:
- New Event: Creates an event for the timeslot that was selected when the option was clicked.
- New All Day Event: Creates an all-day event.
- New Recurring Event: Creates a recurring event.
- Today: Goes back to today’s entries when they are no longer on the screen.
- Right-click an entry for these options:
- Open: Opens the event or transaction.
- Show Time As: Select one of these options:
- Free
- Tentative
- Busy
- Out of Office
- Label: Select a label (colour) for the entry:
- None
- Important
- Business
- Personal
- Vacation
- Must Attend
- Travel Required
- Needs Preparation
- Birthday
- Anniversary
- Phone Call
- Open Transaction:
- Applies only if the entry comes from a transaction.
- Opens the applicable transaction.
- Transaction fields such as the dates cannot be edited on the calendar; they can be edited only on the transaction. However, entries can be dragged onto new days or timeslots, which updates the transaction. The quantities are updated only if the related setting is added to the Transaction Type and enabled (checked).
- If a caption is entered for the setting Resource used for unallocated Events, unallocated events appear on the first row of the calendar and can be dragged onto a resource. The start and end dates must be set on the transaction.