Setup Example – Work Orders
- Use Work Orders to assemble or create finished goods from raw materials, and to manage production.
- They include all the parts and services of the products that must be manufactured or produced.
- Estimates can be linked to Work Orders.
- Work Orders may be integrated with Production Planning.
💡This page provides an example of a Transaction Type setup for Work Orders that are integrated with production planning.
Header
- Description: Work Orders
- Code: WRK ORD
- Entities: All
Settings (tab)
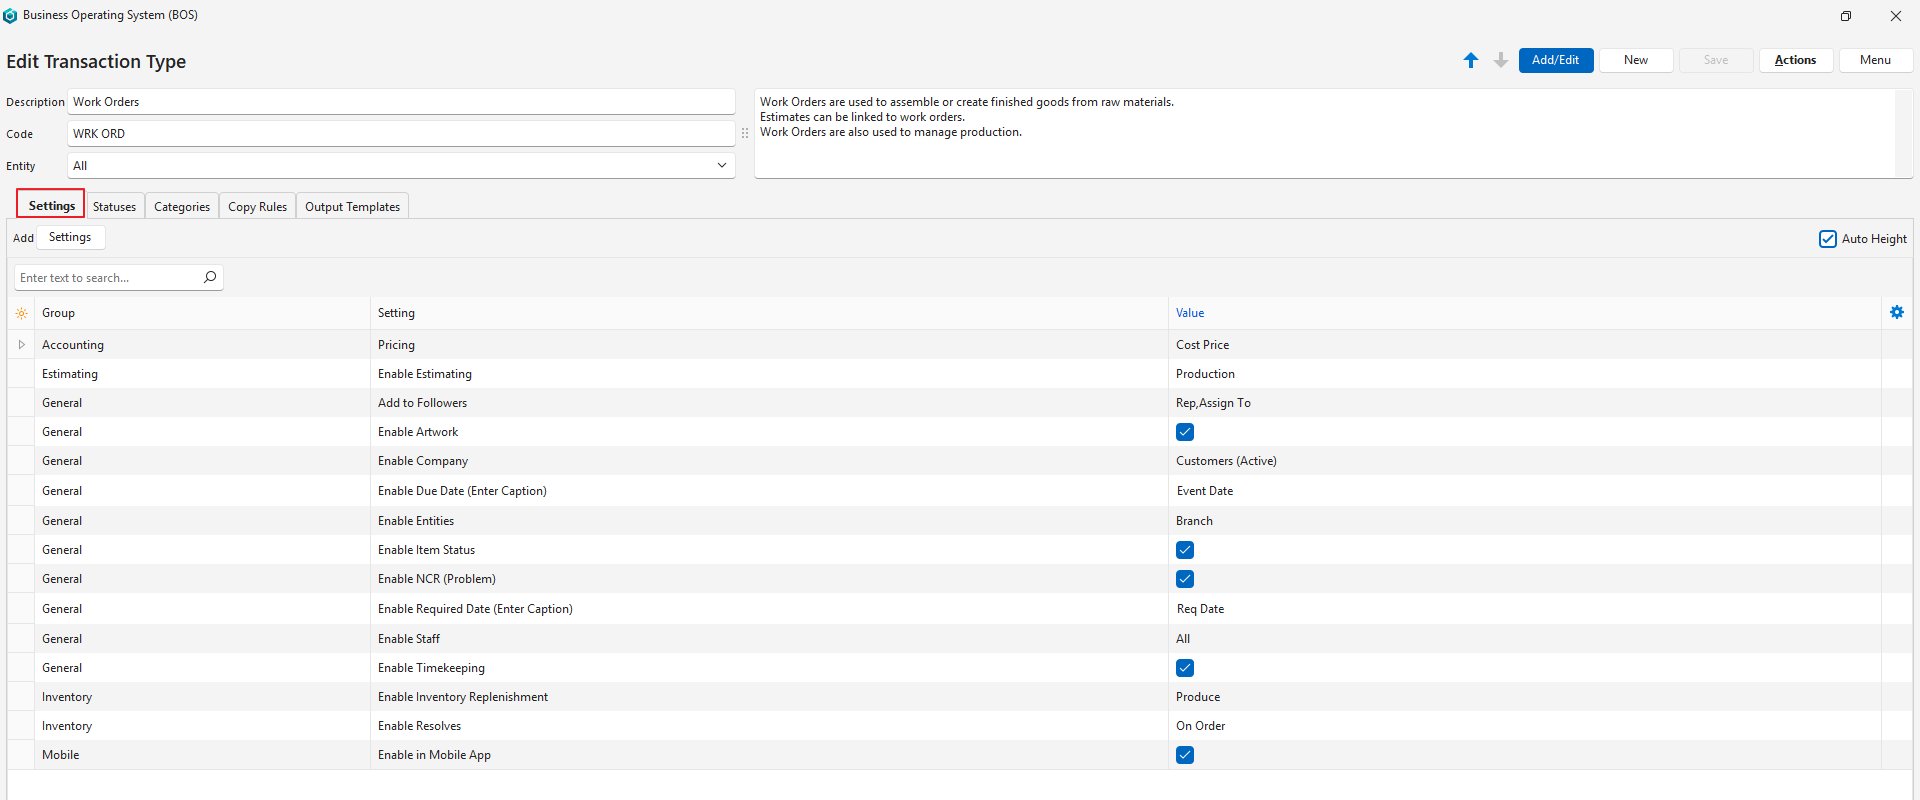
- This section lists the compulsory and optional settings that can be used to customise work orders.
- Settings with Default as part of the name can be changed when capturing a transaction.
| Setting | Description | Value | When Required |
|---|---|---|---|
| Accounting > Pricing | Select a pricing option from the dropdown list:
| Cost Price | Always |
| Defaults > Default – Data Filter | The default filter when you view a list of transactions for the Transaction Type. The options are:
| Select an option from the dropdown list. | The default filter is:
|
| Estimating > Enable Estimating | Select an option from the dropdown list:
| Production (Tasks, Materials & Outwork) | Always |
| General > Add Items from the following Categories | Limits the items that can be added to those in the selected categories. Click Edit in the Value column and select the categories. | Click Edit. Move the categories from the Available to the Selected section to include them. Move the categories from the Selected to the Available section to exclude them. | Add the setting if you want to limit the items that can be added to a work order. |
| General > Add to Followers | Select Follower options from the dropdown list. Multiple options can be selected:
| Rep, Assign To | Add the setting if you want multiple people to receive a copy of the work order when it is emailed. |
| General > Contact Lookup | Select which contact fields to include when selecting a contact for a transaction from the dropdown list. The options are:
| Select the applicable option from the dropdown list. | Add the setting if you want to select the contact by position or location. |
| General > Enable Artwork | Checkbox. If checked, artwork is enabled and can be uploaded to an entry on a transaction as an attachment. | Check the box. | Add the setting if you want to show the artwork on the work order. |
| General > Enable Company | Select what type of company should be in the header:
| Customers (Active) | Always |
| General > Enable Due Date (Enter Caption) | Enter a caption to add the Due Date field to the transaction (e.g. Due Date). | Event Date | Always |
| General > Enable Entities | Select an option from this list:
| Branch | If you want to allocate transactions to branches. |
| General > Enable Item Status | Checkbox. If checked, transaction items can have statuses. If unchecked, only the overall transaction has a status (referred to as the transaction header status). | Check the box. | If you want to track the status of each item on the work order. |
| General > Enable NCR (Problem) | Checkbox. If checked, transactions can be marked as problem transactions for NCR purposes. | Check the box. | If you use the NCR processes. |
| General > Enable Required Date (Enter Caption) | Enter a caption to add the Required Date field to the transaction (e.g. Req. Date). | Req Date | Always |
| General > Enable Staff | Select how transactions are assigned:
| All | If you want to allocate the work order to staff. |
| General > Enable Timekeeping | Enables the Timekeeping module. | Check the box. | If you want to track the time it takes to complete a task. |
| General > Reference Lookup | Enter Reference lookup lists. | Click the Value column and enter the lookup entries, one per line. Check the Auto Height box to show the full lookup list. | If you want staff to select a reference from a lookup list instead of entering one. |
| Inventory > Default – Inventory Location (Production Materials) | Select a default inventory location for production materials. (Inventory locations are created under Entities.) | Select a location from the dropdown list. | If you want to specify a default location. |
| Inventory > Default – Inventory Location (Transactions) | Select a default inventory location for the Transaction Type. (Inventory locations are created under Entities.) | Select a location from the dropdown list. | If you want to specify a default location. |
| Inventory > Enable Inventory Replenishment | Select one of these options to enable replenishment:
| Produce | If you want to create Work Orders from Inventory Replenishment. |
| Inventory > Enable Resolves | Specify what must happen to inventory items. The options are:
| On Order | Always |
| Mobile > Enable in Mobile App | Checkbox. If checked, the transaction can be accessed from the mobile app. | Check the box. | If you want to manage production from the mobile app. |
| Transaction Items > Enable Adding Items | Specify which type of items can be added to a transaction. The options are:
All the buttons to add items still appear. A disabled feature shows an error message when clicked. | Select Custom or Items. | If you want to limit the items that can be added to a work order. |
Statuses (tab)
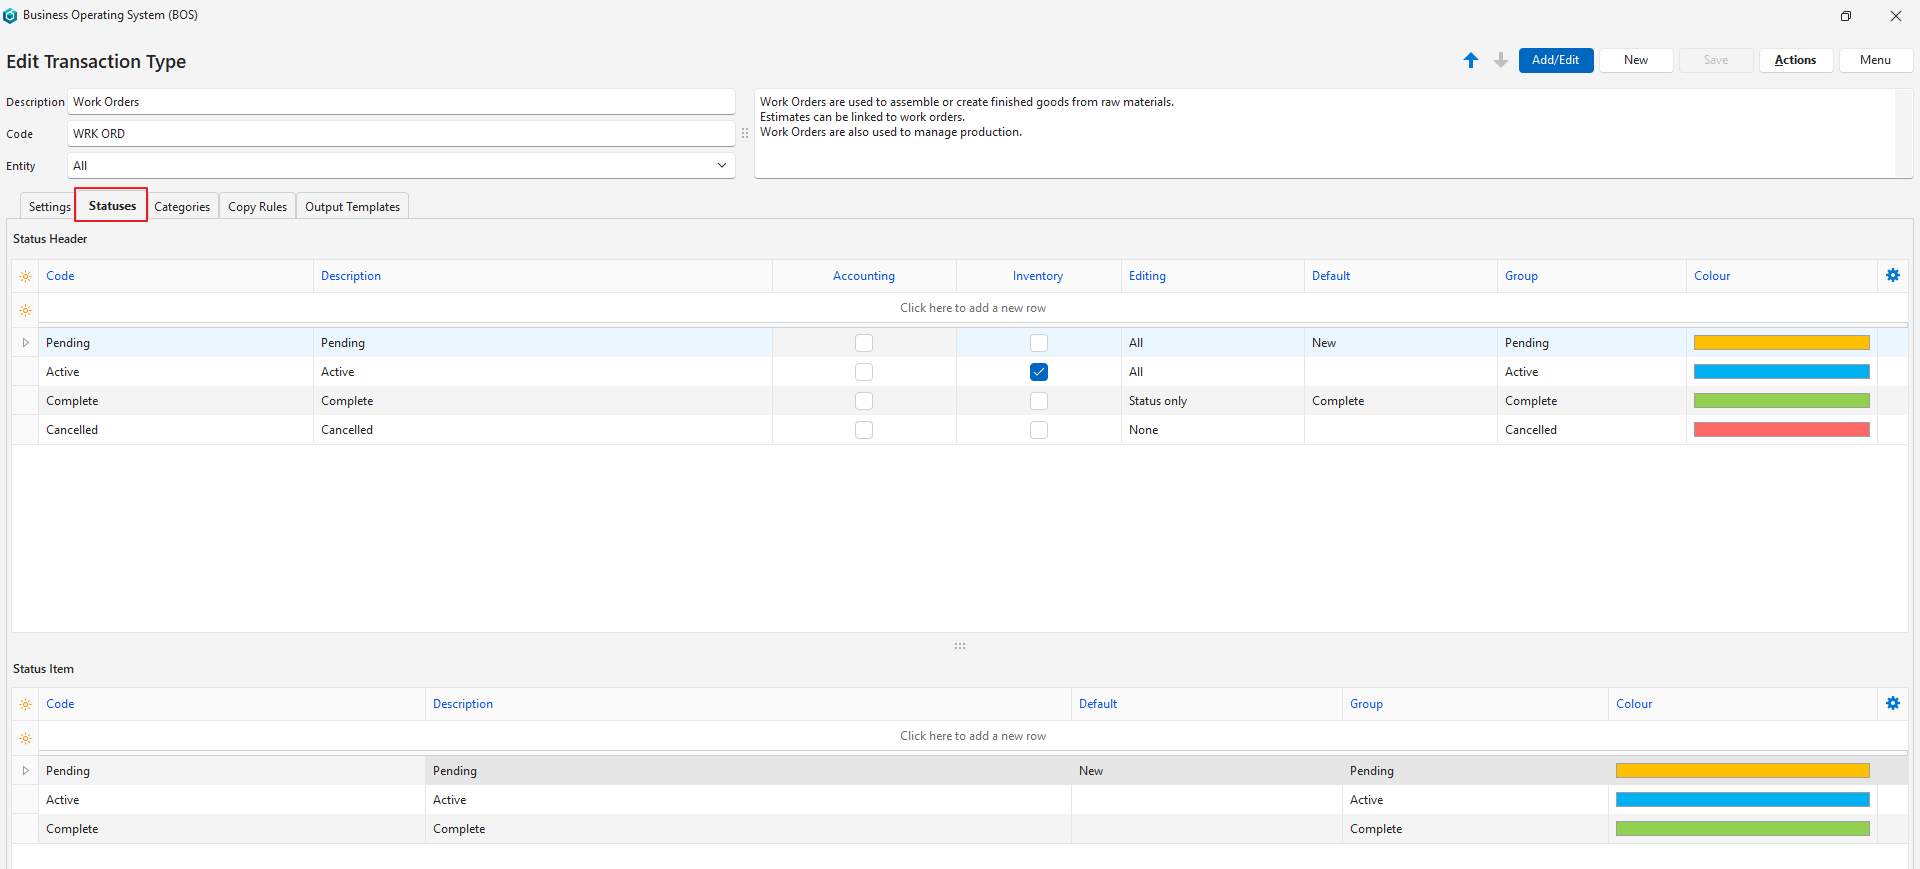
- You may create an unlimited number of statuses.
- However, there are only four Status Groups:
- Pending
- Active
- Complete
- Cancelled
- The first status should allow editing.
- The final status should ideally not allow editing.
- If the setting Accounting > Enable Accounting is checked, at least one status should have the Accounting column checked.
- If inventory is used, at least one status should have the Inventory column checked.
- If editing is allowed when the inventory or accounting columns are checked, any accounting or inventory reports should be considered provisional.
Categories (tab)
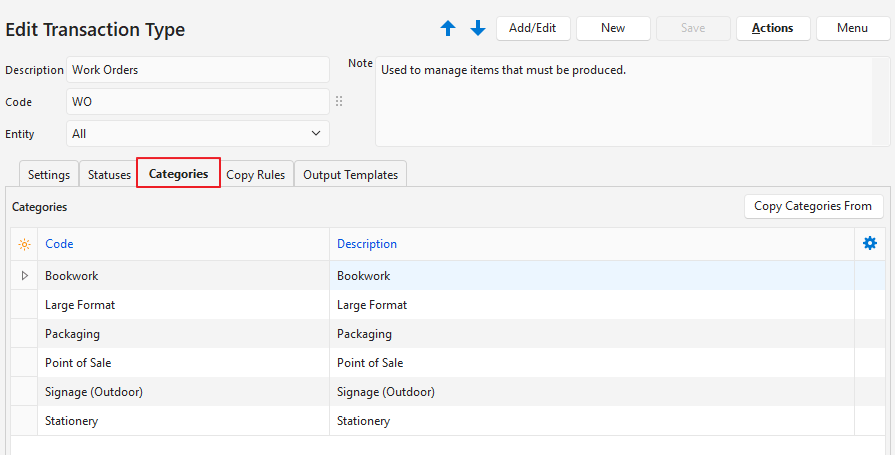
- Use categories to sort records.
- The categories you choose should be meaningful to your business.
- Using categories is optional but recommended.
- Categories can be copied from another Transaction Type. The existing categories are replaced by the copied categories.
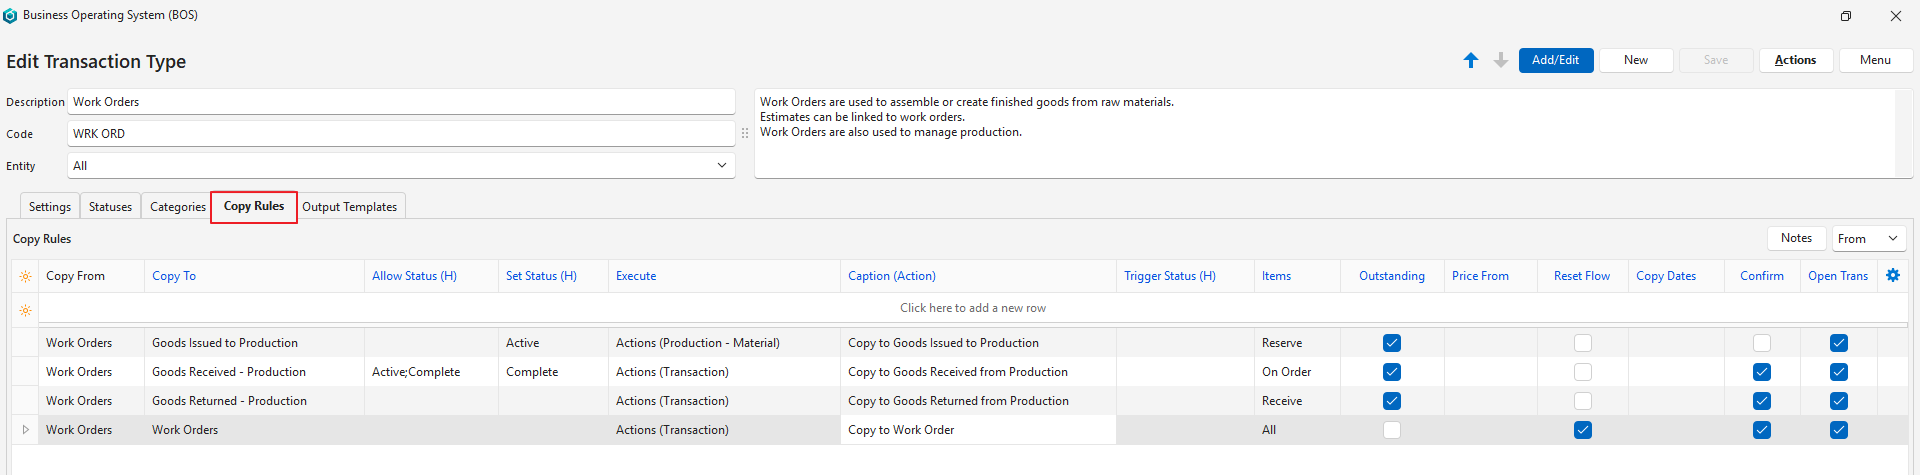
Copy Rules (tab)
- Copy Rules determine when transactions may be copied.
- Although two transactions are involved in the copy, you only need to create one Copy Rule.
- User access must be set for each Copy Rule.
- You can automate copying transactions by selecting a Trigger status.
Output Templates (tab)
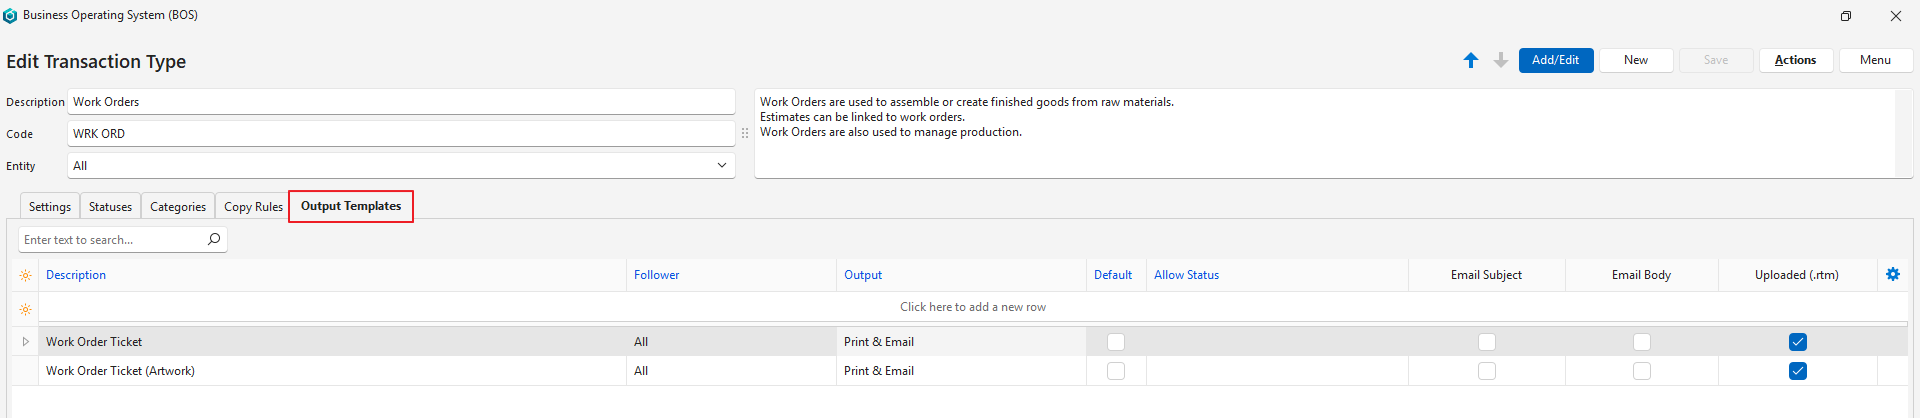
- Output Templates are the forms you need to print, preview or email a transaction (e.g. invoices).
- Default templates are included. They automatically show your company name, logo and bank details, as filled in on the Output tab of a registered entity.
- You may edit these templates to include or exclude information.
- You may also create your own forms and templates from scratch.